
Copy or Archive Classes
Copy/Archiving Classes vs Making Classes Inactive
The difference between Archiving a class and making a class Inactive is that making it Inactive merely moves the class and all its students into an inactive state where it will not appear on your class list and will cease to appear on your web site class list. To reactivate the class you simply change its status from Inactive to Active and all functionality is restored and the class is visible on the web.
How to work with end of period Class Archiving or Copying
When you are ready to prepare the next period of Classes, Member Wizard can perform one of three functions:
- Copy the class and archive the original class - either with or without existing students being copied into the new class.
- Copy the class and leave the original class intact and operational- either with or without existing students being copied into the new class.
- Archive the original class (no copy)
This help file will step you through the process to Copy and Archive a Class only. The options to simply Copy a class differ only in that the original class is copied but remains active.
The option to Archive only a class creates a "frozen" record of the class which will be kept and can be viewed on completion by changing the Status at the top of the Classes list from Active to Archived. Once a class is Archived it can not be made Active again. A list of the Enrolled Students at that time will be stored with the archived class.
Copy the class and Archive the Original Class
Before commencing the Copy/Archive process you should ensure that the new class payment periods are Active. If you do not do this then the new class payment period will not appear when you are sending invoices or payments types.
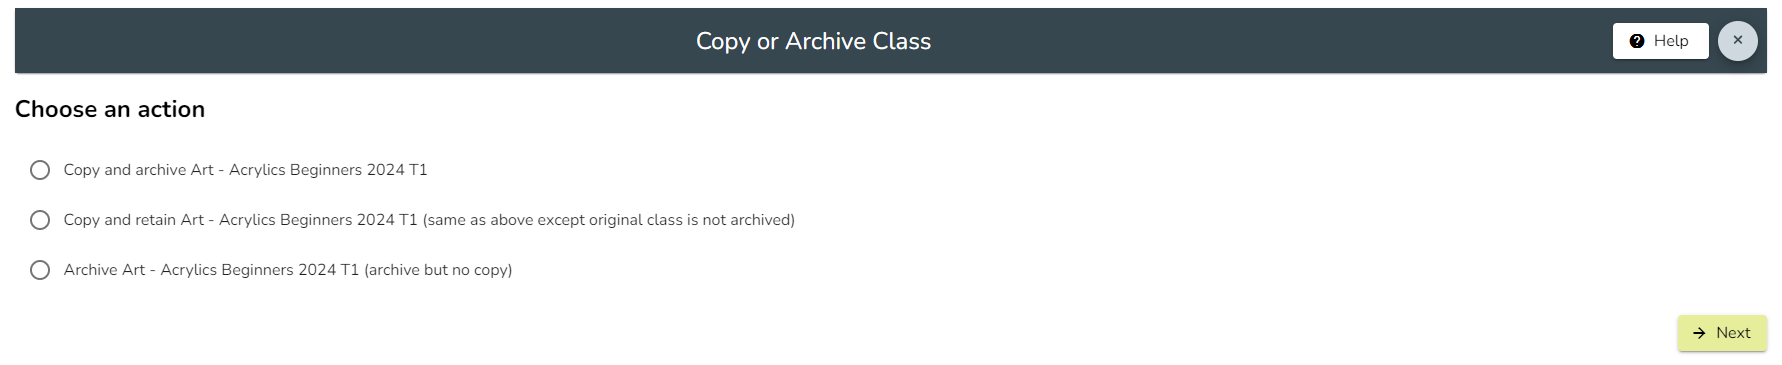
Step 1: Highlight the class in the Class List and select Copy or Archive in the page menu. Then select the first item on the list.
Step 2: The following screen will show a copy of the original Class with the word "Copy" appearing before the name of the class. You should change this to reflect the period of the new class eg by appending Term 2 after the name (if the class is for Term 2).
You should also insert the start date of the new class and enter a cost into the new payment period.
On completion click the Next button.
Step 3: The next screen will display a list of the students both on the enrolled and the waiting list for the original class. Ensure that all those continuing (or in the case of the Waiting List students, joining) the class for the new period. Their enrolment/waiting list will be shown against their name as well as details of their current payment and membership status.
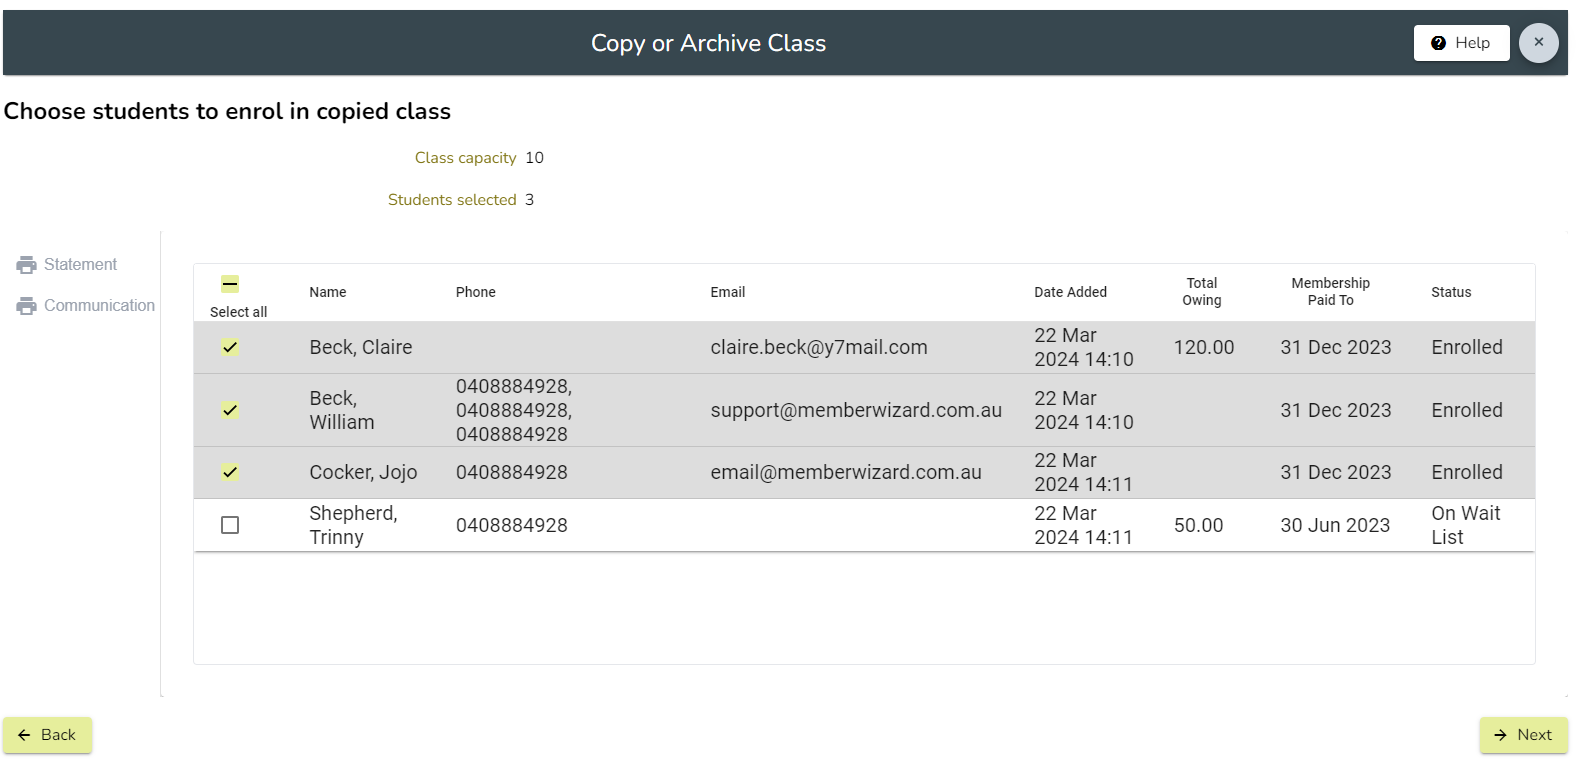
Select all those you wish to enroll in the new class and click Next
Only One Payment Option
In the screen image below you will note there is only one payment type, in cases where there is only one payment option, selected students will simply receive an Invoice reflecting that payment type and this will be reflected on the Enrolled students list. If you wish to email the invoice leave the tick box checked. If instead you wish to copy/archive other classes and possibly enroll the student/s in further classes you may wish to uncheck the box (the invoice will still be created) and wait till all classes are complete then send a Payment Request which will amalgamate all classes onto one invoice for payment.
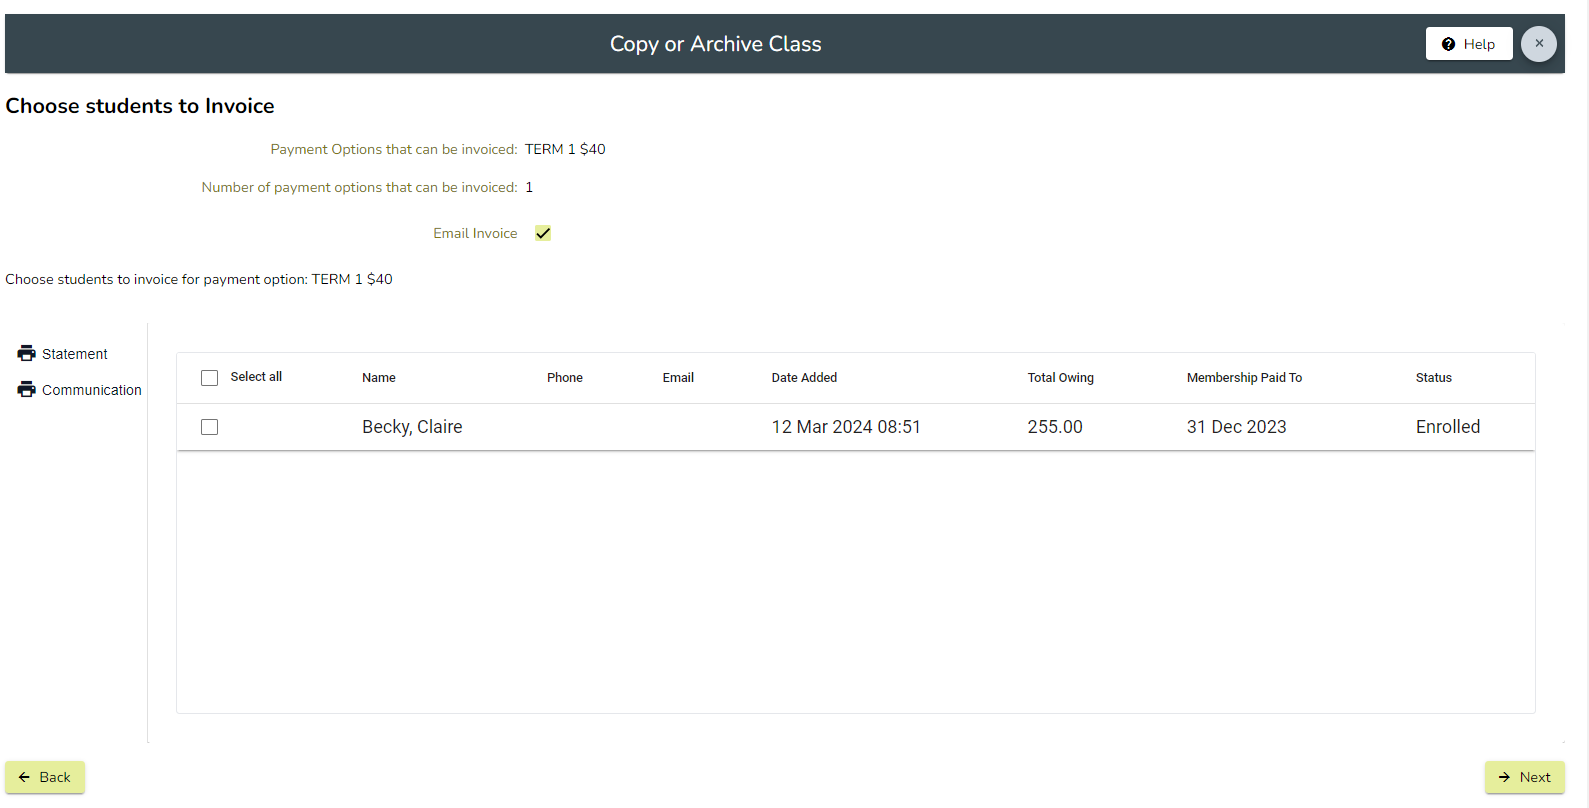
Click Next when you have selected all students you wish to invoice.
Multiple Payment Options
In the screen image below you will note is more than one payment option available. In cases where there is more than one payment option, the selected students will receive a Payment Request which will ask them to select their preferred payment period. No invoice will be created until they have selected their preferred payment period.
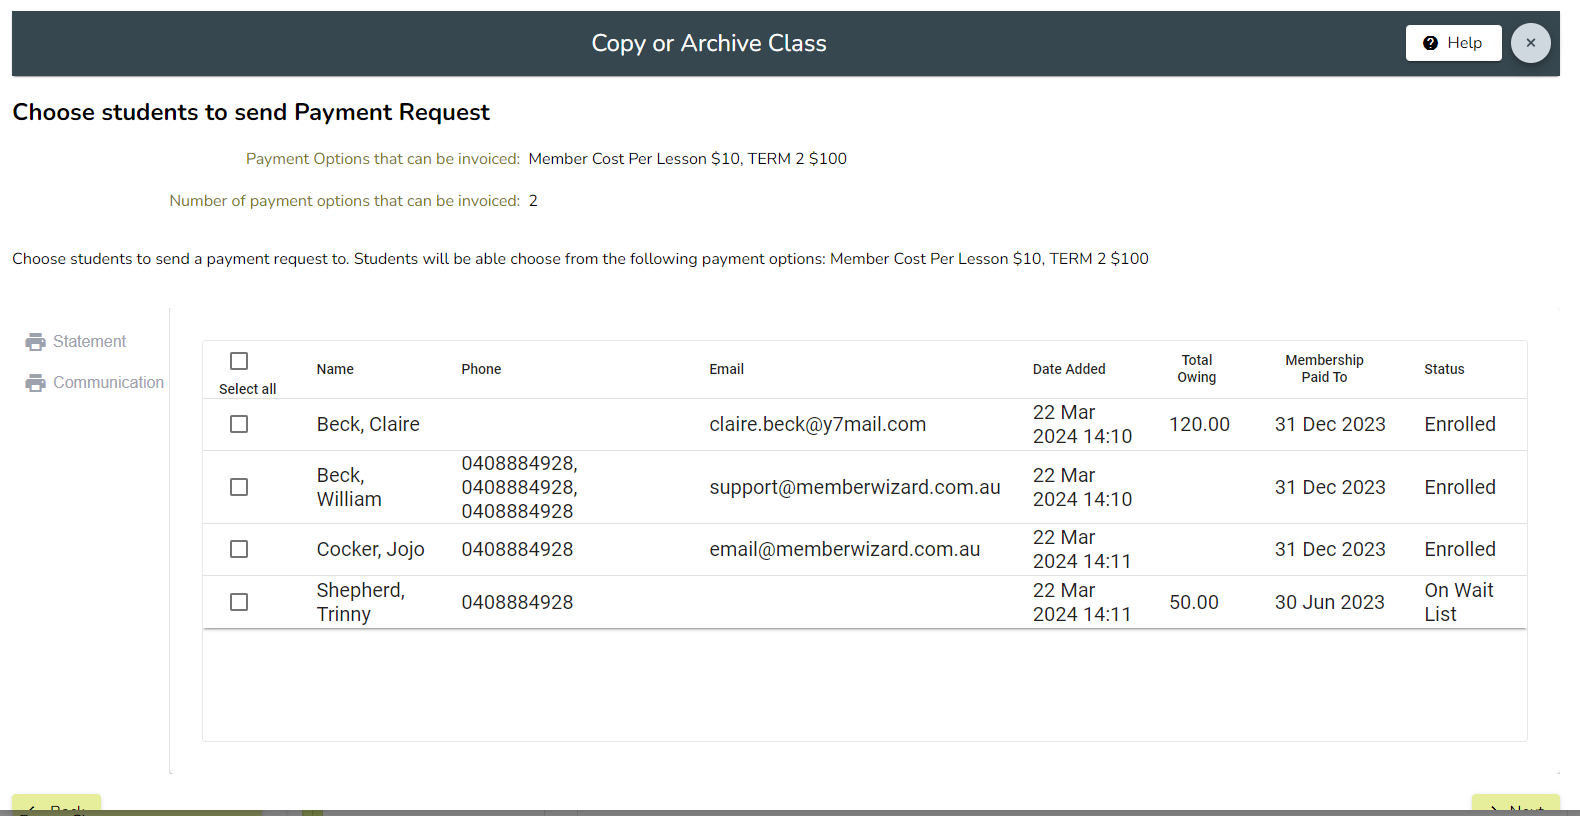
Click Next when you have selected all students you wish to send a payment request to.
No Charge Classes
In cases where there is no charge for the class, students will simply be sent an email advising they are now enrolled in the class which you will compile on the following screen. Click Next.
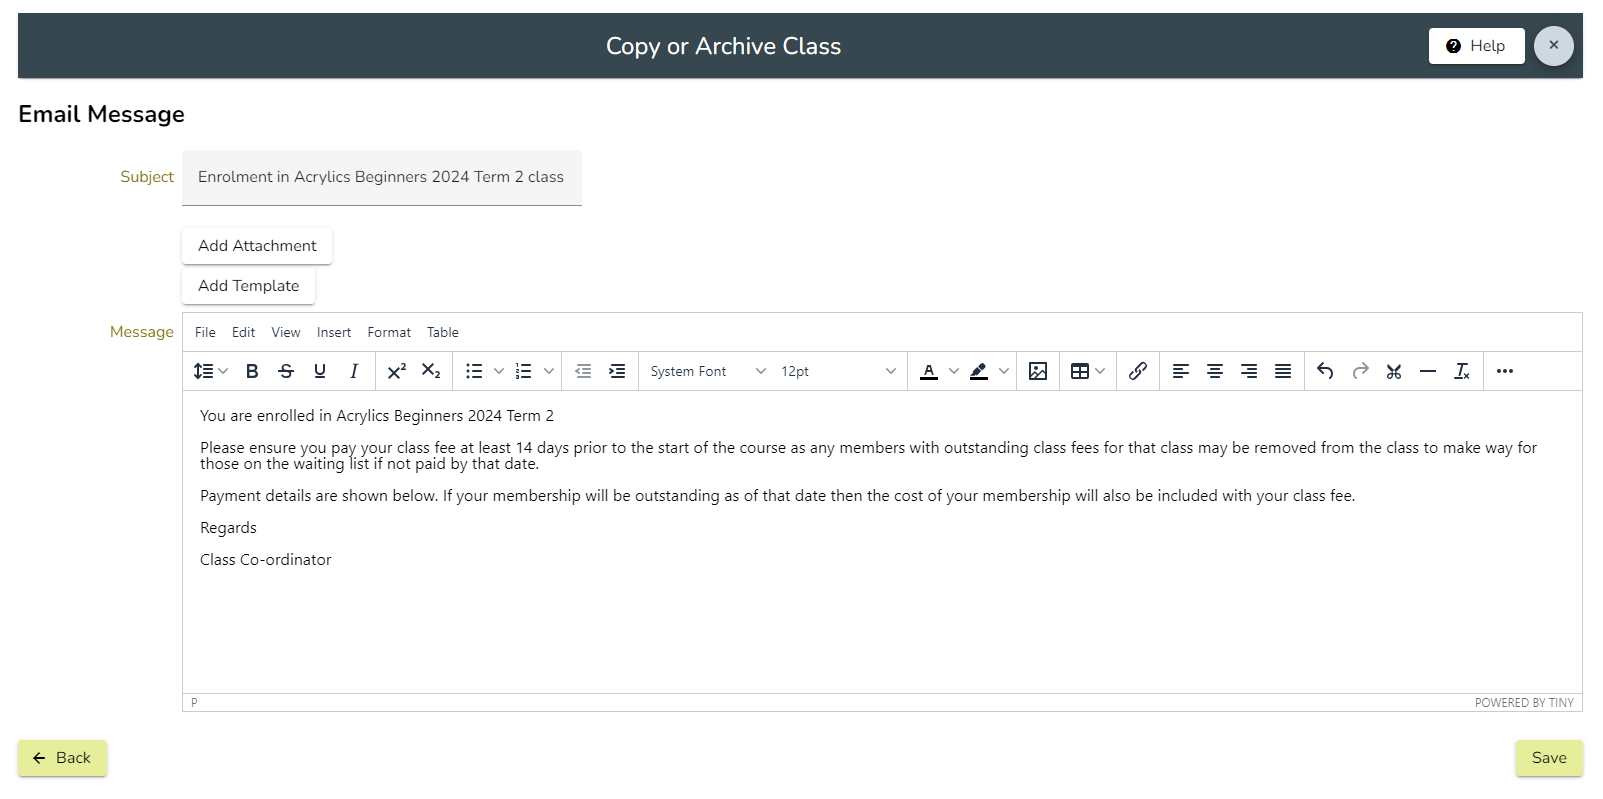
Step 4:The final screen will allow you to type a message to the student. This will give you the opportunity to advise the student of any cut off date for payment to avoid being removed from the class if you wish.
Students without email addresses
This process is only designed for students with an email address. For students without an email address if there is only one payment type then an invoice for that payment type will be created and can be found in Money/Invoices. This invoice can then be printed out and posted to the member if you require. Please note if the member will also BE outside their current membership period at the commencement of the class then an invoice line for membership will also be created.
If there is more than one payment type then you will need to contact the student and ascertain the period that they wish to pay for.
If the class is no charge then you will need to advise the student by phone or by post that they have been enrolled.