
Adding or Creating a New Member
If you do not have a spread sheet of your members or if you have a new member then you can manually add an individual member.
Click on Members in the left hand navigation and select Add Member from the actions box.
There are up to five tabs to the Create Member screen depending on whether or not your organisation runs classes.
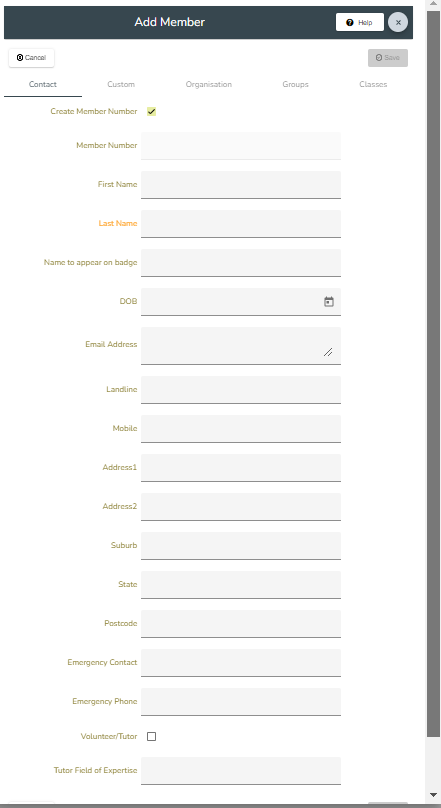
1. The Contacts tab contains the contact details of the member.
There are 3 fields allocated for phone numbers. You can rename these as you choose (Settings/Phone names) and the changes you make will then be the same for all other members in your database. You may choose to call one Mobile, another Home and the third Work for instance. You can also rename the First name and Last name fields (Settings/Phone names).
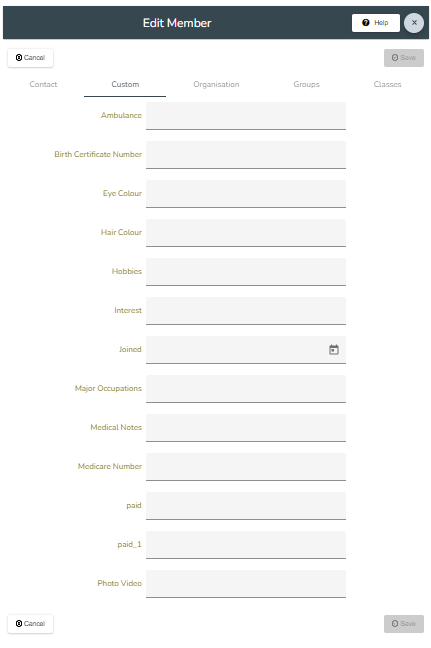
2. The Custom tab records information fields that may be relevant or applicable only to your Organisation. You can add fields for whatever information you wish to store regarding each member's membership.
If there are some fields on the Contact tab which you don't need or want there you can move them to the Custom tab out of the way (Settings/Member Form Layout and follow the Help File).
To create a Custom Field go to Settings/Custom Fields. There are several types of custom fields.
1. Text fields
2. Date fields
3. Yes/No tick box fields
4. Radio button fields
For radio button fields you need to enter each option on its own line in the box provided. Members will be able to choose only one of the options.
3. The Organisation tab records a members details in relation to your Organisation such as their member number and type, when they are paid till, when they joined and whether or not they are Active.
When you have created a new member and click Save you will be asked if you wish to create a membership invoice or receipt for the new member.
If you choose to create an invoice then the system will create an invoice for the member based on the either the membership type selected when creating their record on the Organisation tab or the default membership type selected on the Settings/New Member Application page . This invoice will show as an Amount Owing adjacent to the member's name on the Member List and their Paid to Date will be blank until the invoice is receipted. Note that the invoice will not be emailed to the new member however if you wish to do so then after saving the new member record, highlight their name in the Member List and click the Email Pay Owing button in the page menu. You can view the invoice in the Member Statement.
If you choose to create a Receipt then the receipt form will open and the member's membership type and period will be displayed and their Paid to Date will be then be shown on the Organisation tab. do so then the member's Paid to date will be shown.
If you wish to make a member Inactive they will not appear in your Member List (unless you elect to show Inactive as well as Active members.)
The other way of creating members is to import your spread sheet of members directly into Member Wizard. See Importing your Membership List

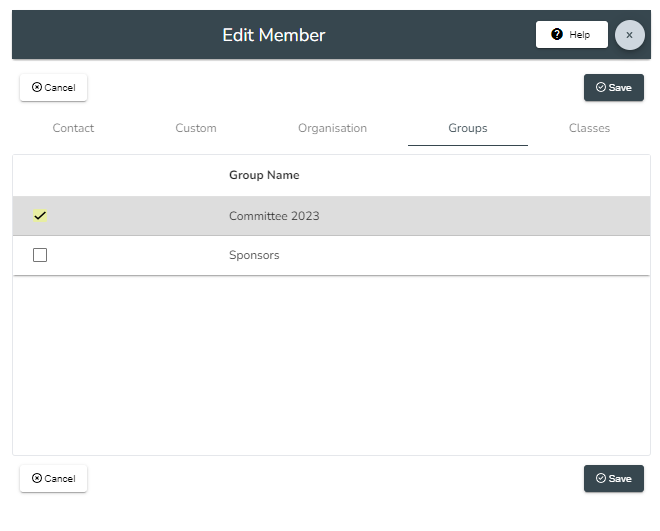
4. The Groups tab shows the groups in which your member is a part. Groups can be for anything, Committee or Members with Dogs. The advantage of putting someone in a group is that you can email that group easily see Members/Managing Groups on how to create and manage groups. This tab is an alternative way to enter a member into a group simply by checking the box beside the group name.
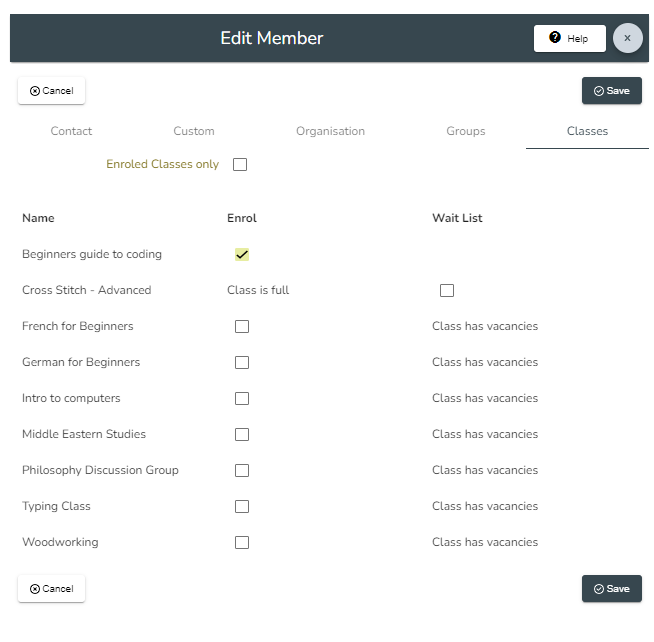
4. The Classes tab will only be visible if you are an organisation which runs member classes and who as requested we turn this service on for your database. On this tab you can add a member to a class (provided there are vacancies). Note when you add a member to a class which has a fee attached to it in the Classes/Class module then you will be asked to select the period or payment option that the student wishes to choose. If there is a per lesson cost available and selected then no invoice will be created but a C will appear adjacent to the weeks for which the student has enrolled on the Class Attendance Sheet. If the student has chosen a Term or Block payment then an invoice will be created but not emailed. You will need to email the student this invoice if you require them to pay. The invoice will show as an amount owing against the student member on the Member List and on the Class Enrolment List.
Locking member record
If a member's record is being edited either by another user or on another device then anyone trying to access it will received a pop up message giving them the details of who is using the record and when they opened it. The record can be unlocked for editing by either closing down the other instance or by forcing a closure through Settings/Unlock Records.
The reason for this is that if both members are editing the same record then the record when saved by the last user will overwrite any changes made by the first user.
Moving pop up forms
If you want to move the pop up form so you can read data from beneath it you can click and hold your mouse button down on the little hand in the top right corner of the form and drag the form to one side if you wish.