
Set up your Organisation
When you first start using Member Wizard you have to set up your Organisation's details in the system.
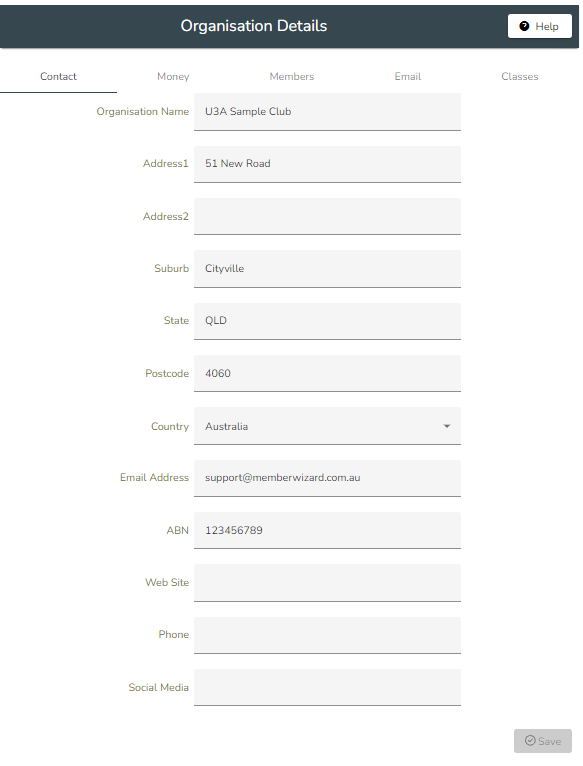
Click Settings, Organisation Details.
You will see up to 5 tabs at the top of the form. The first tab - Contact is to enter details of your organisation such as address, ABN and web site etc. These details appear on receipts, reminders and other correspondence. If you do not have an ABN entered, you will not be able to record GST on your invoices, receipts or expenses.
The second tab - Money - is for entering details on your Organisations financial setup - such as the end of your financial year to help you prepare Profit and Loss Reports.

You can ensure your currency symbol is correctly identified and placed in the correct position and that your organisation's country code is correct and what Account Category you wish to store your GST transactions in. The system default is GST but you should select an account category for both incoming and outgoing GST records. Transactions recorded in this category will assist you to prepare your BAS.
If your organisation needs to send pro forma invoices (quotations) then check the box marked Use Pro Forma Invoice. Invoices will then be initially created marked Pro Forma Invoice instead of Tax Invoice but upon payment they will change to Tax Invoice. This feature is particularly useful in countries who's system for GST is based upon invoices and not receipts (accrual vs cash based).
If you wish your invoices to include any specific information you can enter it in the box marked Invoice Terms and Conditions.
The third tab - Members - contains information on when your membership year expires. There are two options. Choose Membership can end on any date if you have "rolling membership" so that anyone who joins, whenever they join have 12 months from the date they joined.

The other option is All Memberships end on the same date. These details are used when you are preparing Membership Reminders. You need to enter the day and month your membership year ends.
There are a number of tickboxes on this page:
1. If you want your members and Tutors to be able to print name tags from their Portals then check the box Name Tag Print Enabled. Note this will not prevent name tags being printed by users logged into Member Wizard Admin Portal.There are also fields to alter the size of the name tag and whether or not the name tag will include the organisations name, membership year. emergency contact details, perferation cut lines or logo (some logos already include the name). You can also add a QR code identifying the member which will work with the Member Card Scanner on digital membership cards.
2. You can either have All Memberships end on the same day (and nominate that day) or you can have Memberships can end on any day (ie. rolling memberships). If you choose All Memberships end on the same day the box described in 4 below will appear. This means:
- Members who are invoiced to the end of the membership year are allowed to invoice for next year in the last 90 (configurable) days of the membership year
- Members who are invoiced to a date before the end of the year can invoice any time.
- Members who are invoiced to a date after the end of the year can't invoice
4. You can dictate when a member can pay their following year's renewal. The default is 90 days from the end of the membership year. If you tick this box the member will not be permitted to renew until inside the number of days nominated.
5. You can also arrange for each member to be given a membership number by checking the box Increment Member Number. For this to work your member numbers can only contain numbers (no alpha or other characters). The system will take the highest number already issued and increment it by one for the new member. If you later want to edit the member's designated number you will need to temporarily turn this off before trying to change their number in their member record.
You should also enter here any Membership Renewal Instructions. This information will appear in any Member Renewals you email. For instructions which appear on Print Membership Invoices you need to enter them in Print Renewal Instructions.
The fourth tab Email is for you to nominate who will receive email bounces if you have incorrect email addresses recorded in your system. The default is to send them back to the person who sent the original email but you may wish to nominate someone in your organisation who will deal with sorting out the correct email address and updating the system. If so simply uncheck the tick box and enter their email address. It is also where replies to system emails such as receipts and invoices will be sent.
The field Person who receives email enquiries from website is for organisations using the Member Wizard web template and the Contact Us drop in panel.
If you wish to use the feature of delaying the sending of email you need to enter the time zone in which your organisation operates. The time/date of sending delayed emails will be based on this setting. If you do not set this then time zone will be in UTC.

The fifth tab Classes contains a check box which will add an invoice for membership renewal to any class invoice if the member's Invoiced To date is in the past.
You can see their Invoiced To date in their membership record on the Organisation tab. If the member has already been sent a Membership Invoice then the Invoiced To date will be in the future and they will not be charged for a second membership payment.
This adding of a membership renewal invoice will only occur when the member is enrolling in classes online.
This is also where you can enter Universal Excluded Dates. These are dates when your organisation runs no classes. There is a place in the Class Edit page where you can set excluded dates for individual classes.
If your organisation limits either the total number of classes a member can enroll in or the total number of classes in a particular subject, either for the full duration of the period or for the initial enrolment period you can set these parameters on this page.
Firstly check the box marked Implement Enrolment Period. You will then be asked to enter the dates of the relevant Enrolment Period. This is the period in which the restrictions will operate. The purpose of this is to prevent members from filling all spots in say exercise classes while others may not have had an opportunity.
Firstly you need to define the start date for classes to which the enrolment restriction will apply in the Applies to classes starting after field.
There are two levels of restrictions. On this page you set the total number of courses a member can enroll in during the nominated period. The other level of restrictions is imposed at the Subject level in the Classes module and will be covered there.
If you want the member to only EVER be able to enroll in a certain total number of classes in a Term say, then make the period for the full term. Otherwise you may only want to restrict them at the start of the enrolment period but when everyone has had an opportunity to choose a class and there are still vacancies, further class enrolments may be permitted.
This screen is also where you nominate the email address to receive Withdraw from Class emails from student members via their Member Portal. This email address does not have to be one connected to a Member Wizard User. You also here need to select the email address of the Class Coordinator and advise whether or not they will receive copies of all enrolment emails. If you do not check this box then the co-ordinator will not receive withdrawal requests or enrolments.
You can rename the terms applied to Tutors and Classes and also whether or not you have Secondary Tutors. If you change the label of these terms then the change will be shown on all member facing pages but not within the Admin Portal.
If you wish to enable the Allow Portal Membership Renewal button in the Member Portal at this time then check the box accordingly otherwise this function will be greyed out to prevent members from renewing and possibly double paying for their membership for that year.
Finally in obtaining the widget for your website (not the Member Wizard template website) you can separate out classes from events from one day classes and obtain separate widgets for each or a combination of 2 or 3 of these. We recommend you keep them combined as one and select the first option.

Click Save when complete. See also Upload Logo
U3A Online
This option is active for any organisation who is a U3A. It allows the organisation to join U3A Online as a Group Member and for their members to then access all U3A Online for a low membership fee (currently $10 pa). See the U3A Online help file for more details