
Import Bank Transactions
To manage your financials through Member Wizard you can use either a manual or import data option. With the manual option you basically just enter deposits and expenses in the system and when you come to reconcile your bank statement you can add any you miss. The other - sometime faster - method is to download a transaction file from your bank and import it directly into the system going through each item on the import and allocating it to a particular financial category. It is this latter method that we will discuss here.
Firstly download your bank's transaction file for your organisation to your computer. By transaction file we don't mean statement, most banks have an option for you to download the actual transaction records in a form which can be directly imported into your financial software. The format that Member Wizard uses is QIF. You can choose either 2 or 4 digit date format. Download and save the file to somewhere you can access on your computer. To import the downloaded file go to Money, Import Bank Records in the left hand main navigation.
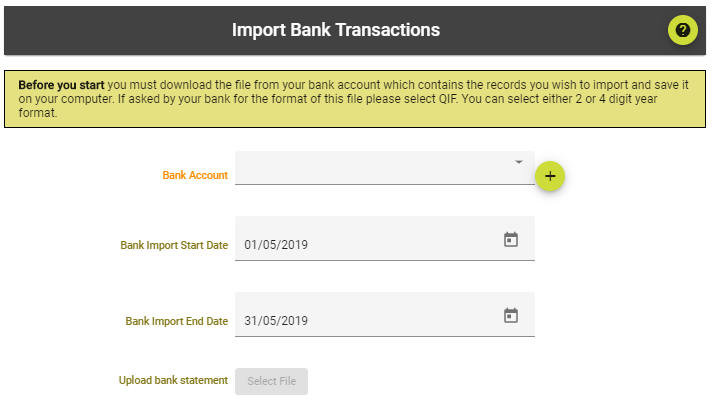
Step 1 Select the relevant bank account Step 2 Enter the start and end date for the transactions you wish to import Step 3 Click the Choose File button and find the downloaded QIF file from your bank Step 4 Click the Upload File button.
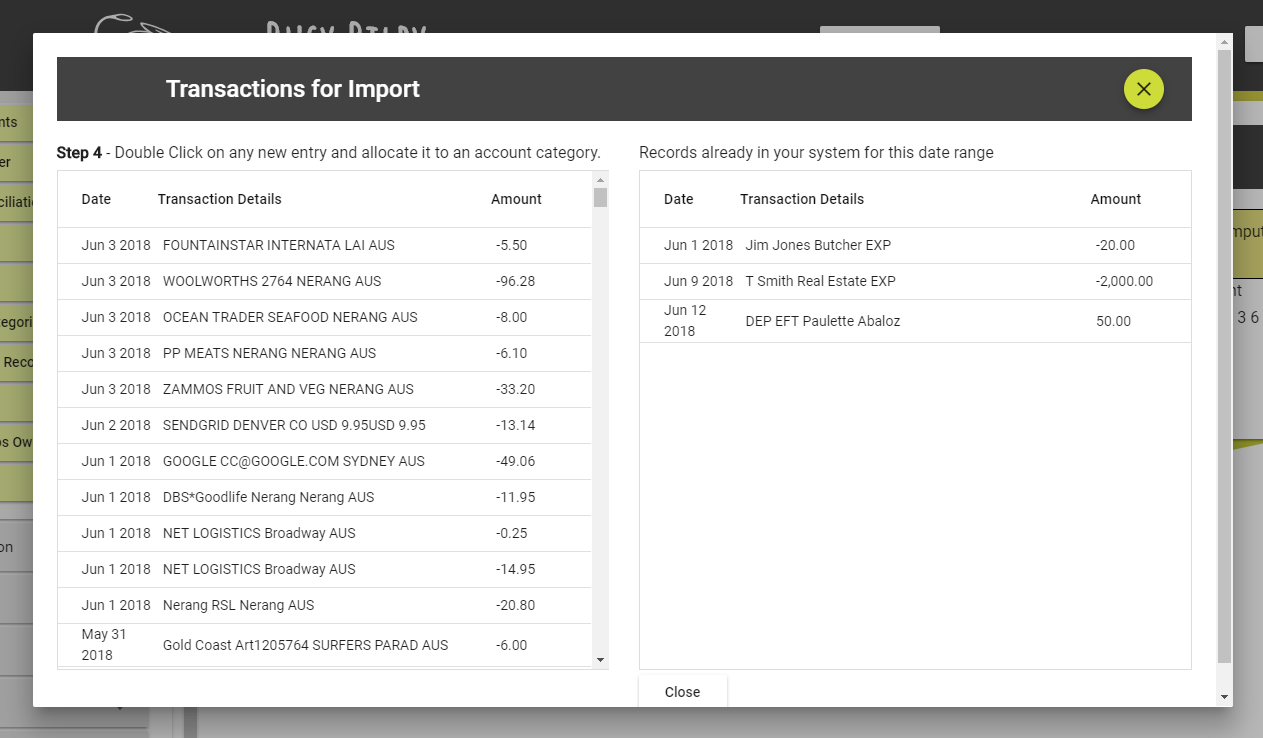
In the left column you will see all the bank transactions which have been downloaded while in the right you will see all those transactions which are already in your system for the designated period (you do not need to import these transactions as they are already in your system).
Double click on the first transaction in the left column which does not match any entry in your right column.
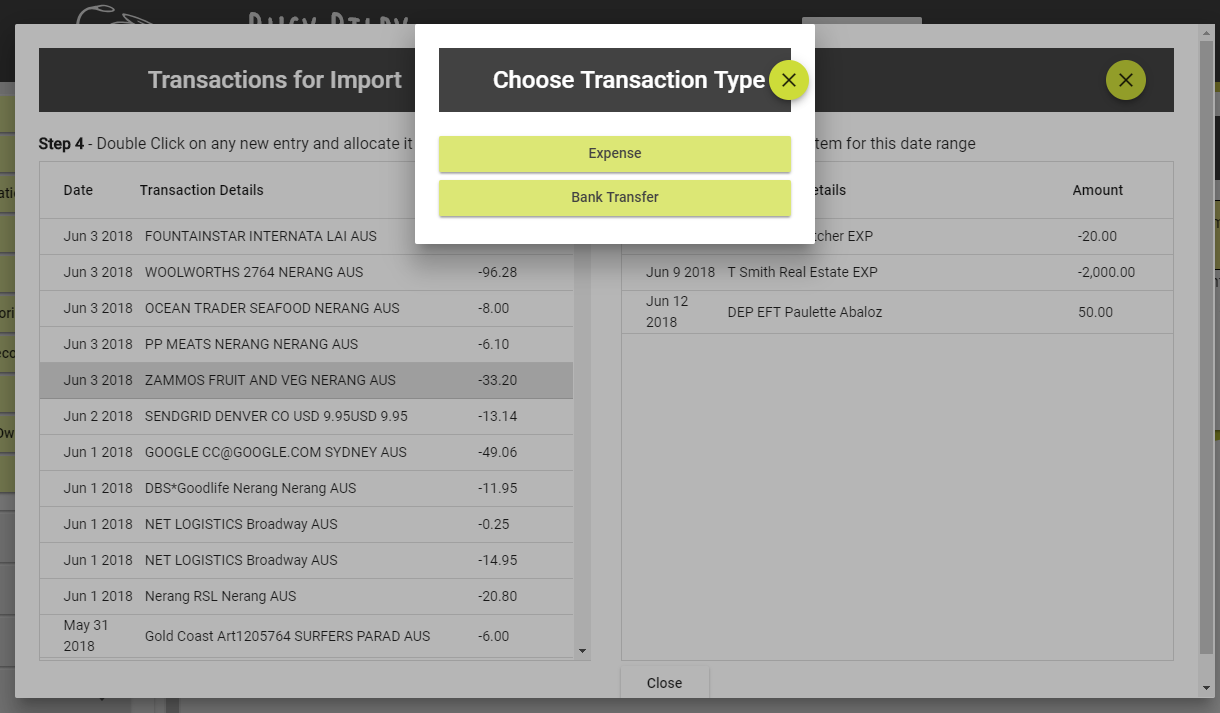
Select whether the transaction is an Expense or a Bank Transfer(for amounts debited to your account) or a Receipt or a Deposit (for amounts credited to your account).
Enter the relevant information and click Save. The item will then appear in the right hand column on your screen.
Repeat this for all the items in the left hand list then click Save to complete.