
Creating Custom Fields
Member Wizard has two categories of data which it can store for your members - Standard and Custom.
Standard Fields are those such as First name, Last name, Email address, Phone and others which are common to all organisations
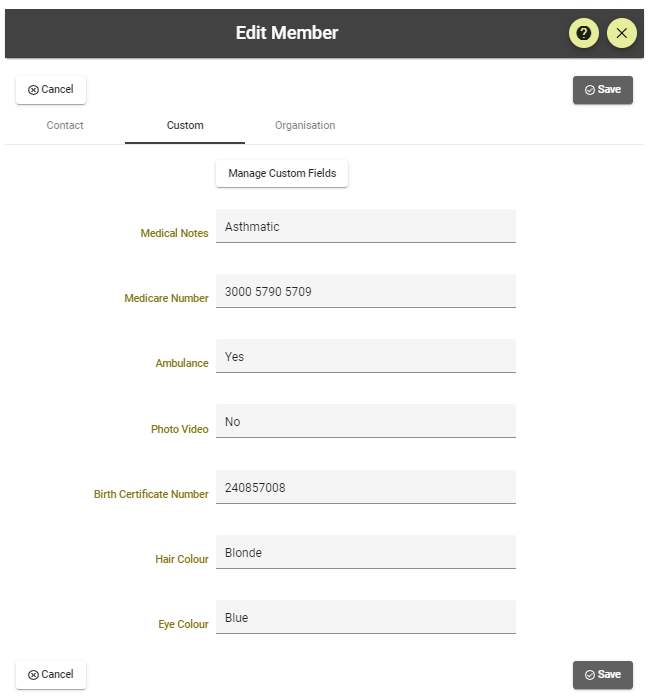
Custom Fields are those particular to Your Organisation. These can consist of anything your organisation chooses to retain data on. The Custom Field data on any member can be viewed by clicking on the member's name in the Member List then selecting the Custom Field tab at the top of the member's details.
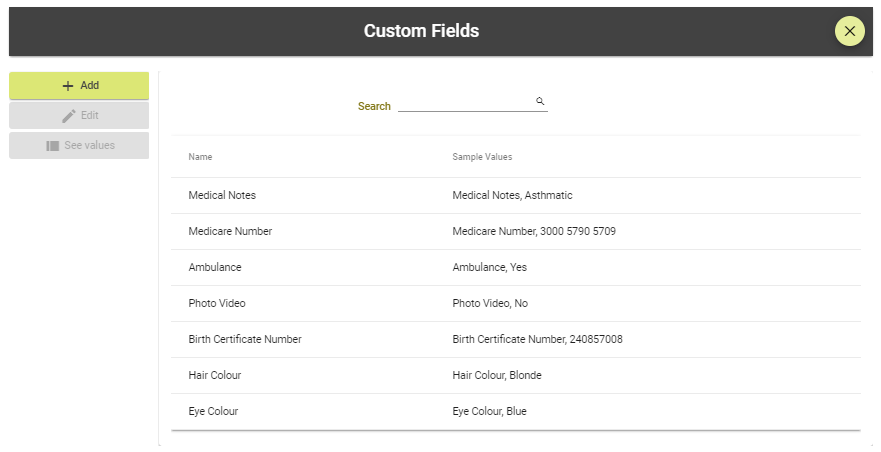
To create a Custom Field click on Settings/Custom Field and then select Add from the form menu. Add the details of the field you wish to add and select the Type of field it is. There are 4 types of Fields:
- Text
- Long Text
- Date
- True/False.
- Radio button (choose an option)
- Email address
- Check boxes (for multi select options)
The first 3 of these are self explanatory.
The Radio Buttons field is for when you want a member to select a preferred option for something. Simply type the options each on their own line and the member will be able to select one.
 Select the appropriate type then ensure the Active box is checked. If you no longer wish to display a custom field you can uncheck this box and it will no longer appear.
The Email Address custom field option is if your member (individual or organisation) needs to both store and have able to be used for communications, more than one email address.
The Checkboxes option works similarly to the Radio Buttons option except the member can select mulitple options.
If you create custom email fields the standard email field will be renamed Primary Email and the other custom email fields will be offered to be selected when you send out Emails. If a custom email address does not exist in the member's record, it will send to the primary email address. You can choose to send to one email address or to all of them.
You can enter as many email addresses as you need. These will be created on the Custom tab of the Member record where you can move them to wherever required on the Contact tab in Settings/Member Form Layout.
If you need the member to be able to see the field in their Member Portal or enter information into it on the New Member Application form you need to check the box marked Allow member to edit.
If you need the make the custom field mandatory to be filled out when joining or updating their contact details check the box marked Required for member to join/update
If you want to move your fields from one tab to another (say from Contact to Organisation) you can do so using the Settings/Member Form Layout by simply selecting the field and dragging it to the new location. Remember however to click Save at the bottom right of the page to lock in the new field location.
If you wish to Delete a Custom Field you firstly have to remove any data which is stored within it. You can locate this data by highlighting the Custom Field in Setting/Custom Fields then clicking the Show Values button in the left hand menu. After you have deleted all data you will be able to highlight the field and click Delete.
