| Date |
Version No. |
Changes |
| |
|
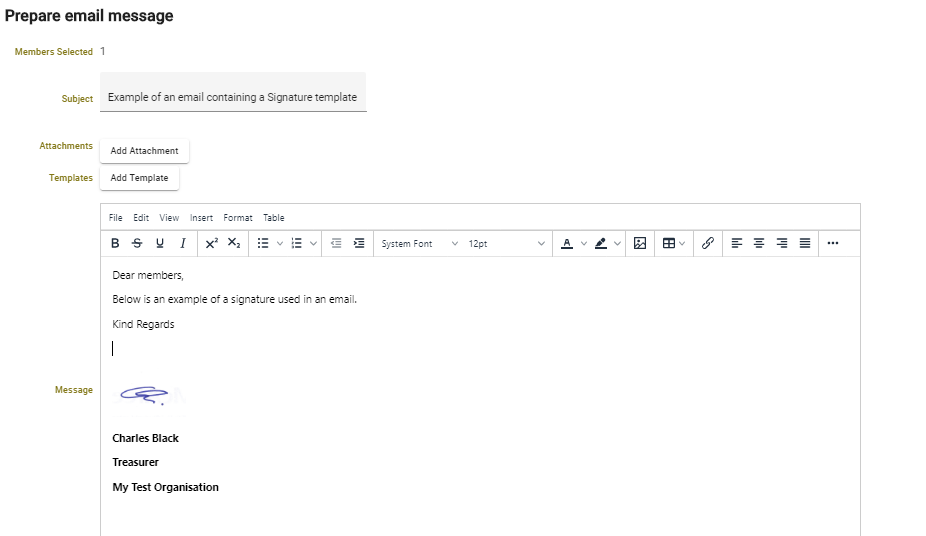
Calendar event panel on website template
Warning if admin enrols student to a waiting list only class (1003)
Print Member list - please add Total Active Wait List (1873)
Class Audit List export filter (2047)
|
| 9/6/2026 |
1447 |
Fixed: Email pay owing does not return after send (1692)
Added Website Template Menu Font Size Options.
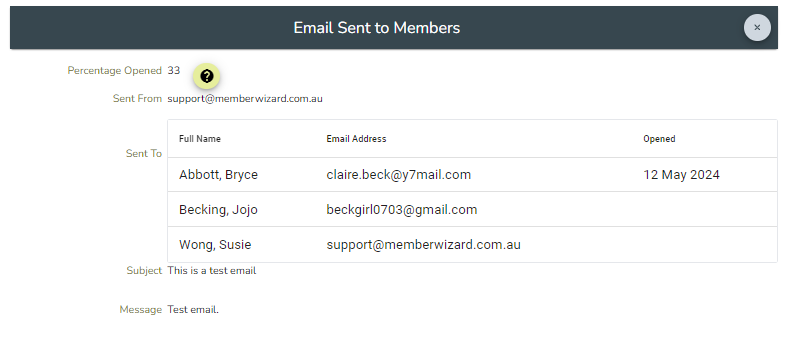
Fixed: Members can't see body of emails and lose Home Button (2019)
Angular 22 upgrade
Indexes on Communications sent
|
| 8/6/2025 |
1446 |
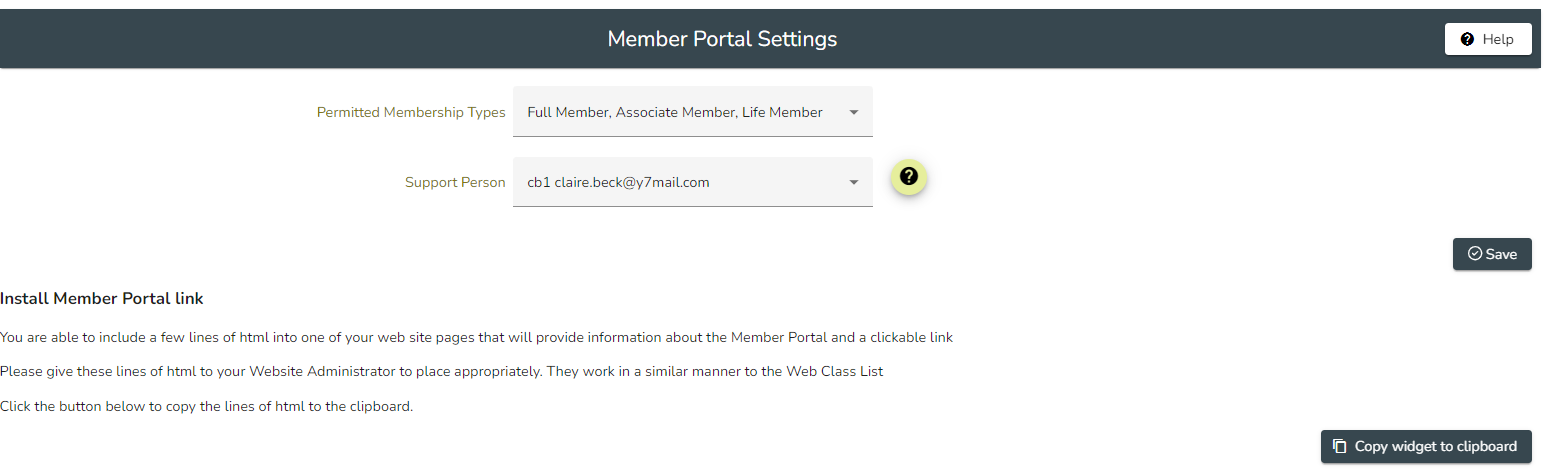
Clarification of terminology on Member Portal start screen (2008)
Tutor Portal - include search on Class list. (1991)
|
| 2/6/2026 |
1445 |
Fixed: Tutor Portal - Email Students - has two fields named Status (1994)
Able to view student history from the Enrolled Students list - select the student then the Classes button to see current classes and the option to select past classes or Events(1943)
Web template event panel will show "No Current Events" when empty (1914)
Fix deleted membership number bug
|
| 30/5/2026 |
1443 - 1444 |
Release Member Wallet Card and Member Wizard Scanner app for all organisations
|
| 29/5/2026 |
1442 |
Fixed: Classes - Attendance - Mark Attendance showing removed students (1990)
Fixed: Communications SMS - select by class, cannot select wait list (1969)
Display print Date range selected for weekly timetable (1947)
Classes - Email Students and Tutors - retain email message when BACK (1961)
Fixed: Class Brochure ignoring selected dates for single date classes (1878)
|
| 28/5/2026 |
1441 |
Fix delete event error
GL Account Category Reporting date range (1661)
Tutor Portal - Add ability to email ALL students (Enrolled+Wait List) (1992)
|
| 27/5/2026 |
1440 |
QR code scanner package upgrade
Fix Facebook panel errors
|
| 26/5/2026 |
1439 |
Custom date range available in General Ledger (1983)
Fixed: Notification not received regarding new members (1957)
Fixed: JOINING FEE PROCESSED AGAINST PARENT ACCOUNT (1970)
Tutors - change to defaults and Export all fields (1941)
Issues using iPhone 17+ to enrol in classes in Member Portal (1973)
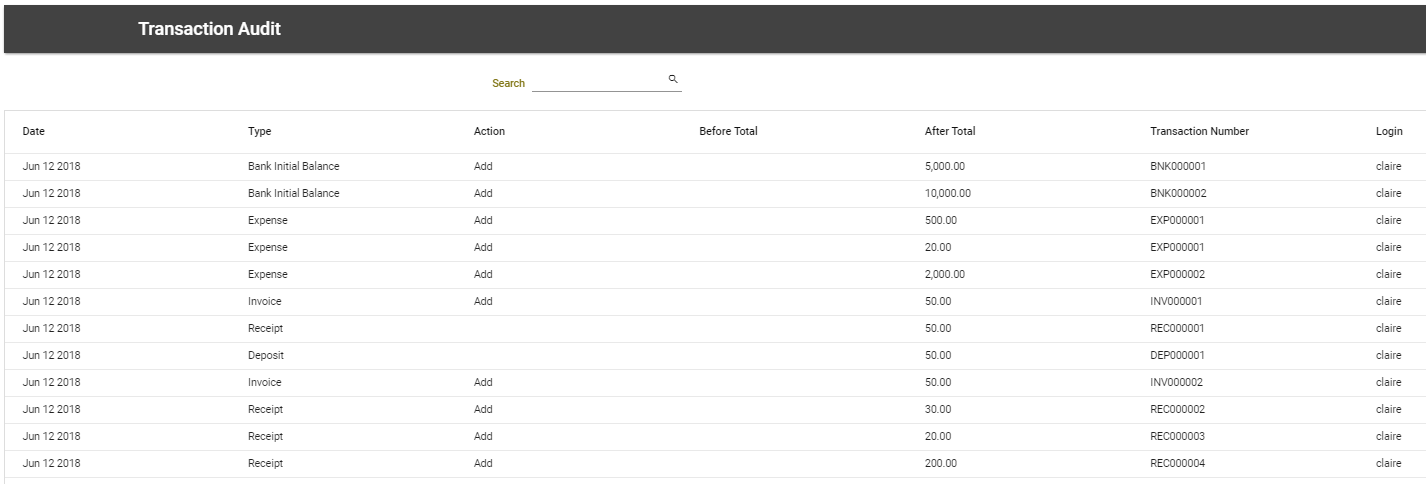
Fixed: Receipts not showing in Transaction audit if paid by Stripe (1967)
Search - using mobile phone number to handle different formats (1944)
Multi select custom fields,
|
| 20/5/2026 |
1438 |
Set Max No. of classes in Subject but exempt from overall (1510)
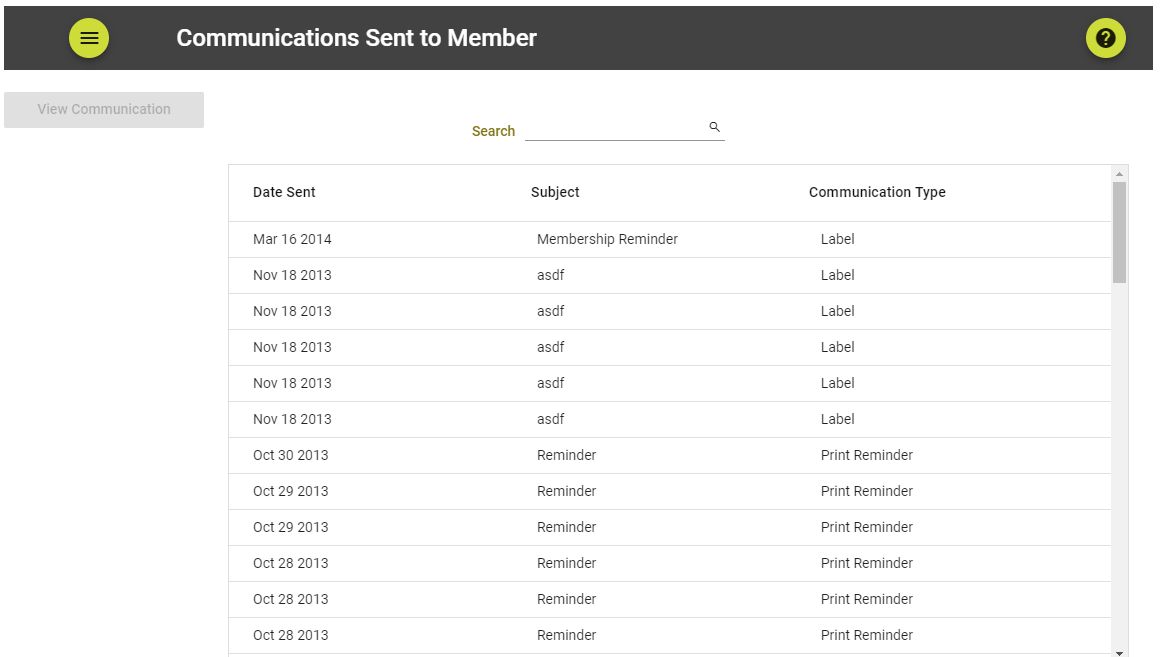
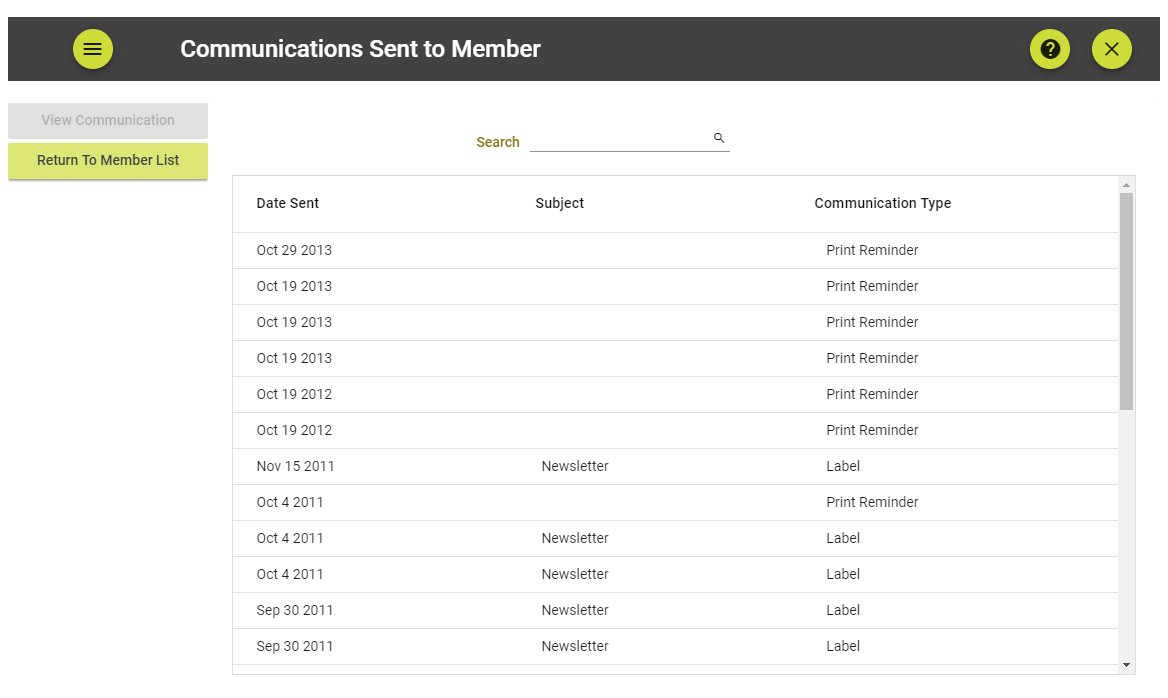
Fixed UI in View Communications Sent (1960)
New setting: New members can not enrol until membership is receipted. (1896)
money owing for events only to show event owing. (918)
Fixed: Waitlist Showing Incorrect Time Received (1974)
|
| 18/5/2026 |
1436 - 1437 |
Ability to schedule email sending (1935)
Fix: Email Pay owing -> showing Email address heading but no address (1948)
Fix: Bulk Attendance Sheets-classes included that are outside of date range (1880)
User list now has active tickbox (1885)
Enrolment period restrictions now apply to waitlist as well a enrolments (1703)
Fix Class Audit Dates (1952, 1954)
|
| 13/5/2026 |
1435 |
Fix Member Portal renew membership permissions (1933)
Early Enrollment Restrictions applied consistently (1742)
Warning when mandatory custom fields left empty in admin portal (1837)
Enable save of member list filter settings (1839)
Venue cost in class export (1931)
Fix P&L (1851)
Members can preview U3A Online classes
|
| 12/5/2026 |
1434 |
Corrections to access permissions enforcement (1932)
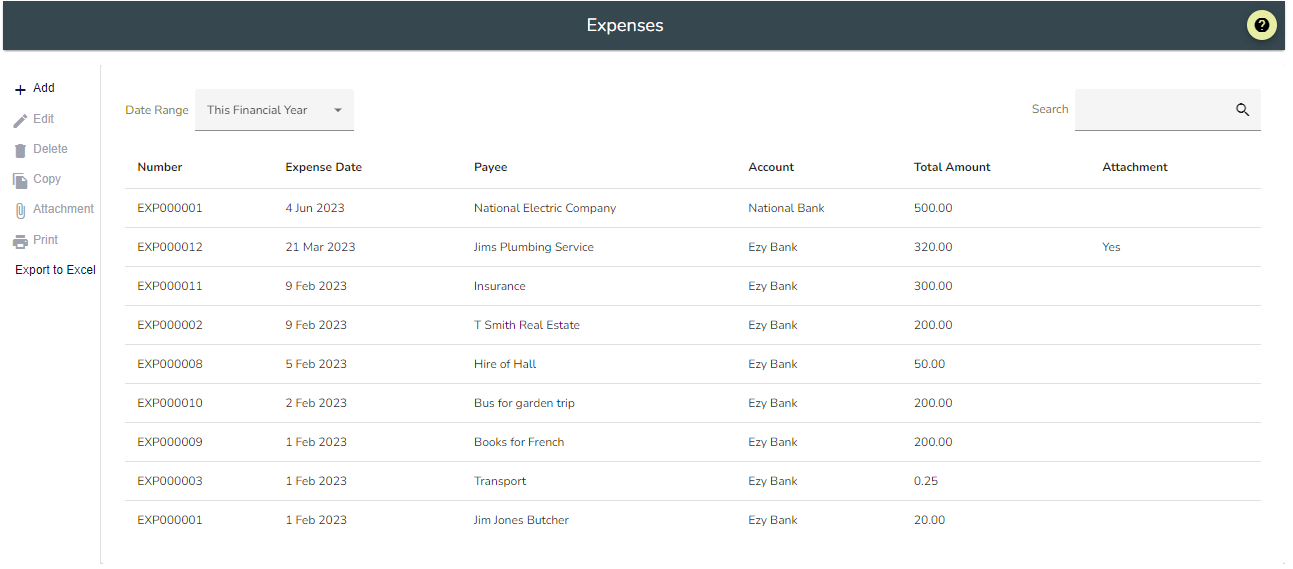
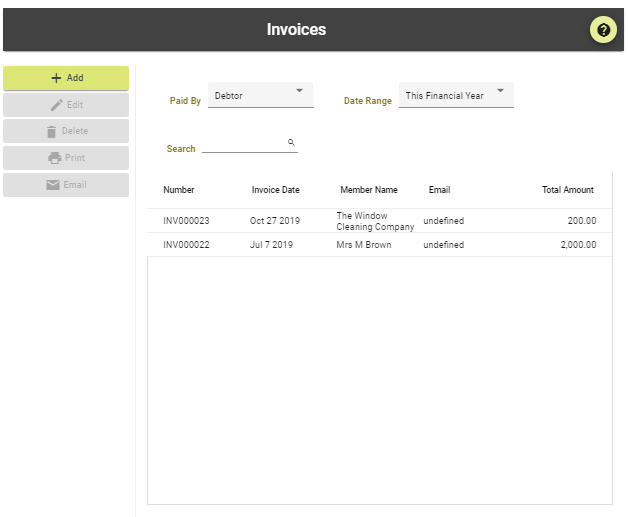
Default Date Range Selection changed to "This Financial Year" (1912)
Emailed Event is made more legible (1909)
Class and Event attendance can be recorded by scanning a QR code on the member name tag.
|
| 8/5/2026 |
1433 |
Fix U3A Online null schedule bug
|
| 7/5/2026 |
1432 |
Fixed: Weekly Class Timetable ignoring selected dates for single date classes (1879)
Default date range to "This Financial Year"
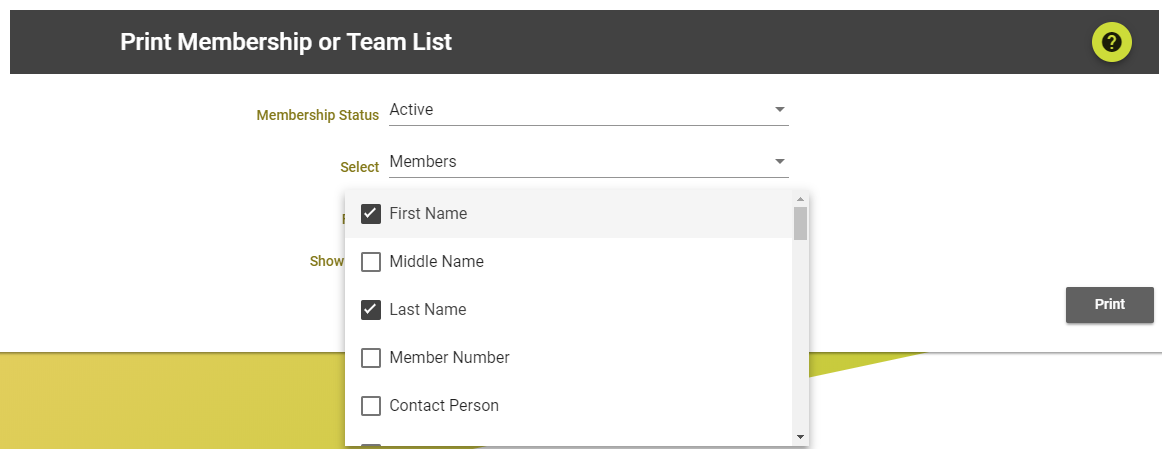
Provide Export ALL Fields (or set list) capability for Members (1860)
Confirmation of marking in Mark Attendance (1650)
Print Waiting List order changed (871)
Contact Details in Event Registration Linked to Member Record (1296)
Bulk Attendance Date Range selection issue fixed (1854)
|
| 4/5/2026 |
1431 |
Print Attendance sheet - totals incorrect fixed (1736)
Class enrolments closed message in edit member (1739)
Terms and conditions not closing after confirmation in web class list fixed (1858)
Custom filter added to money lists (1035)
Remove unnecessary tick boxes from class web list (1904)
Fixed MONEY RECEIPT EXPORT TO EXCEL - DATA TRUNCATED (1887)
|
| 3/5/2026 |
1429 - 1430 |
Fix web class list bugs
|
| 29/4/2026 |
1427 - 1428 |
Database: all foreign keys indexed for performance
Added VenueNotes and VenueOfficeNotes to class export
Added venue hire cost to venue. Available in export classes (1908)
Website portal: animations, carousel, FAQ, image cropping
|
| 23/4/2026 |
1426 |
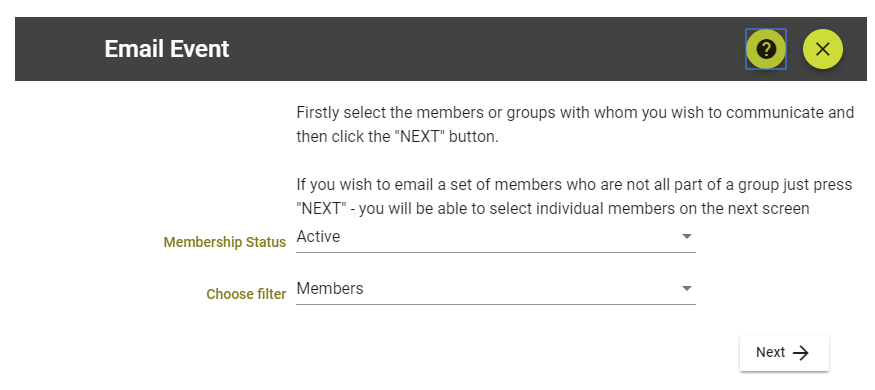
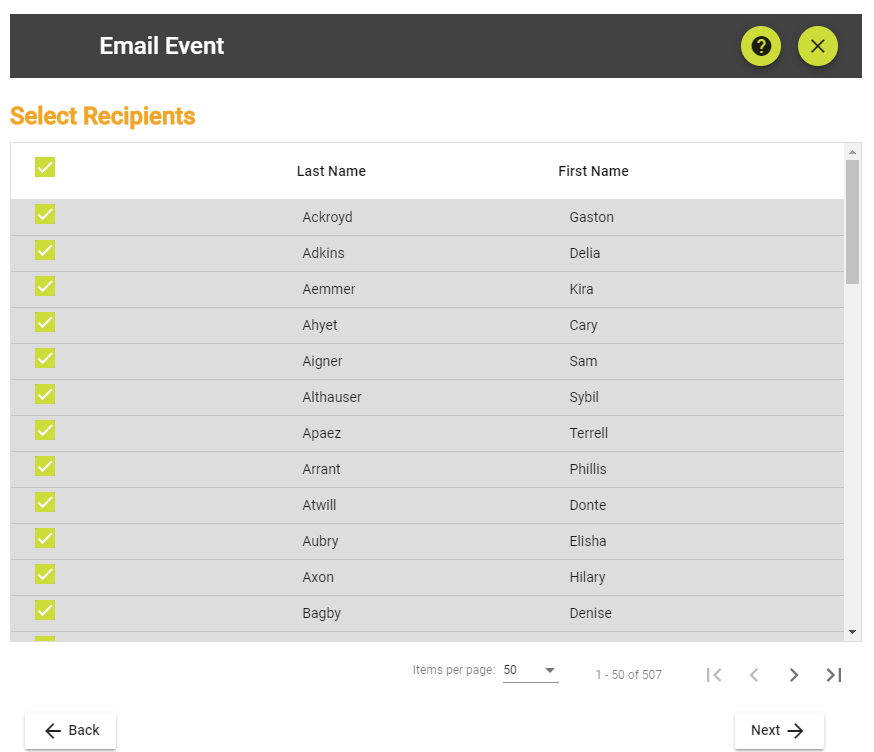
Email event participants can add an attachment (1525)
Fix U3A Online signup
|
| 20/4/2026 |
1425 |
Ability to email Archived/inactive classes in tutor portal and admin (1501)
All classes - student list improvements (1818)
Tutor email templates (946)
|
| 15/4/2026 |
1424 |
Fix delete communications sent errors
Website favicons can be updated (1467)
Display of "No classes" in webclass calendar view when classes held. (1762)
|
| 10/4/2026 |
1423 |
Fix excluded dates in member portal (1829)
|
| 9/4/2026 |
1422 |
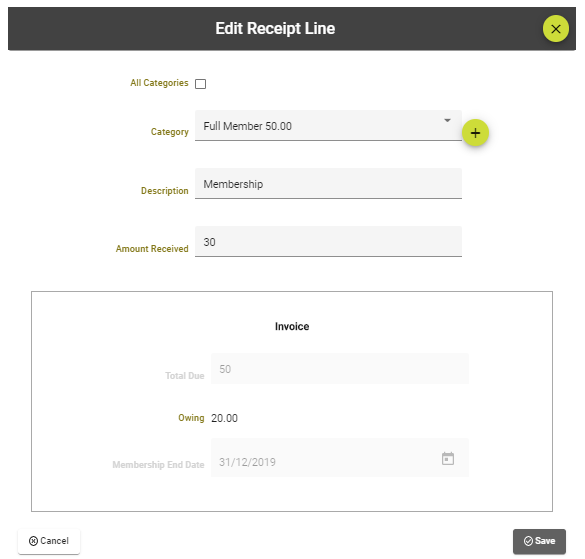
Display invoice number in the receipt line (716)
Website Template: Add button to Reset Header (1451)
List of receipts etc now default to displaying This Month. Other options added: This Quarter, Last Quarter
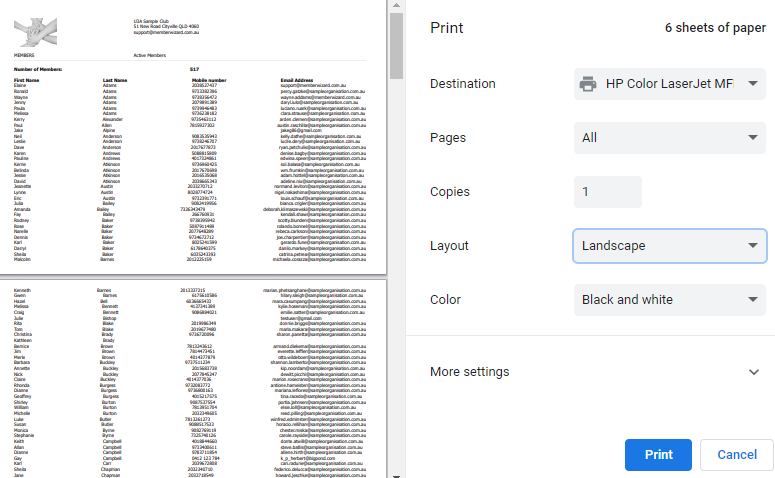
Print Member List optimised.
Fix time added to wait list (1806)
Fix class status change (1840)
Allow Web Class List enquiry added to bulk tutor status change (1841)
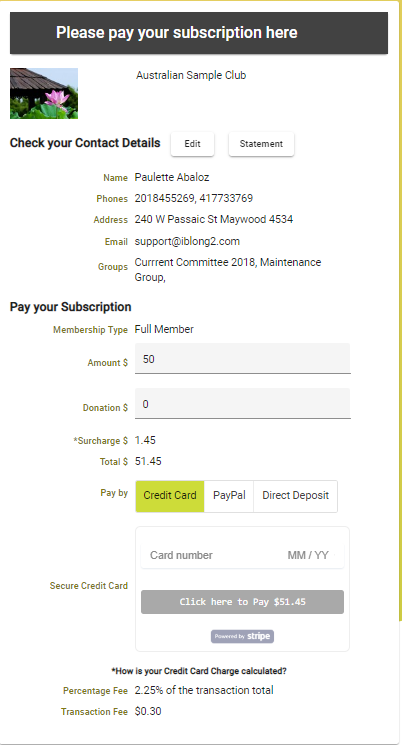
Option to hide Stripe merchant and admin fees in member statement (1803)
|
| 7/4/2026 |
1421 |
New tickbox in Edit Class: Class enrolments closed (1739)
Incorrect time added to wait list corrected (1806)
Tutor appears in attendance sheet (1813)
Fixed: "Only allow online join waiting list" Flag Status Not Being Retained (1817)
Tutors Portal - Include Touch to call option (493)
|
| 6/4/2026 |
1420 |
New tickbox on tutor form: Allow Web Class List enquiry. If checked, people looking at the Web Class List will be able to click a Contact Tutor button (1244)
|
| 3/4/2026 |
1419 |
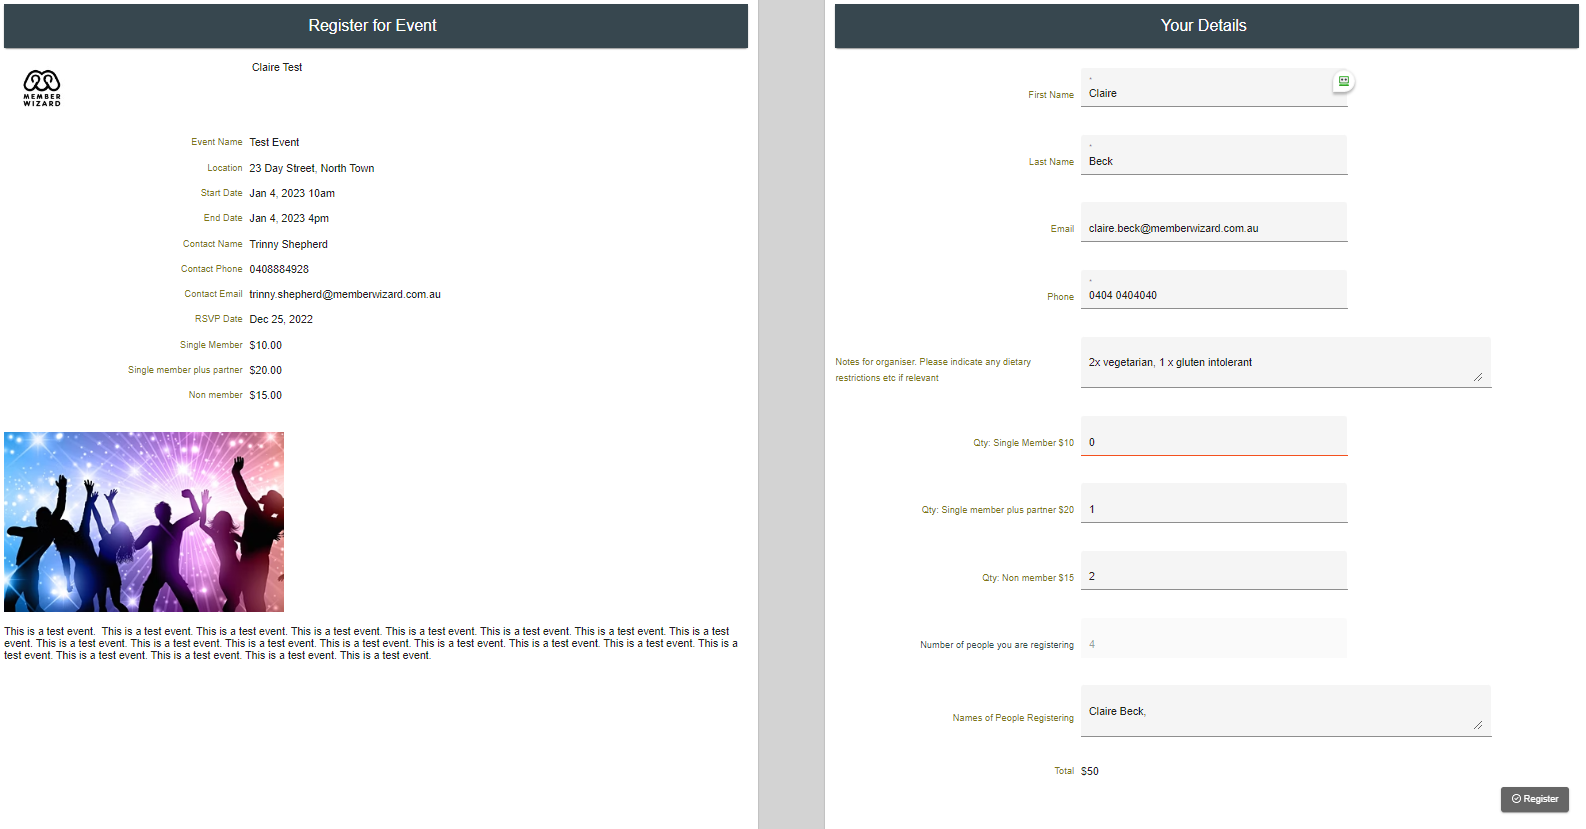
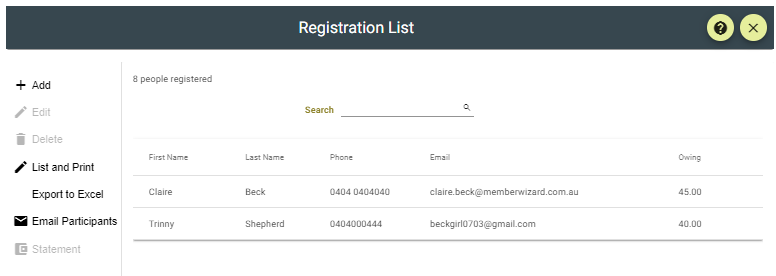
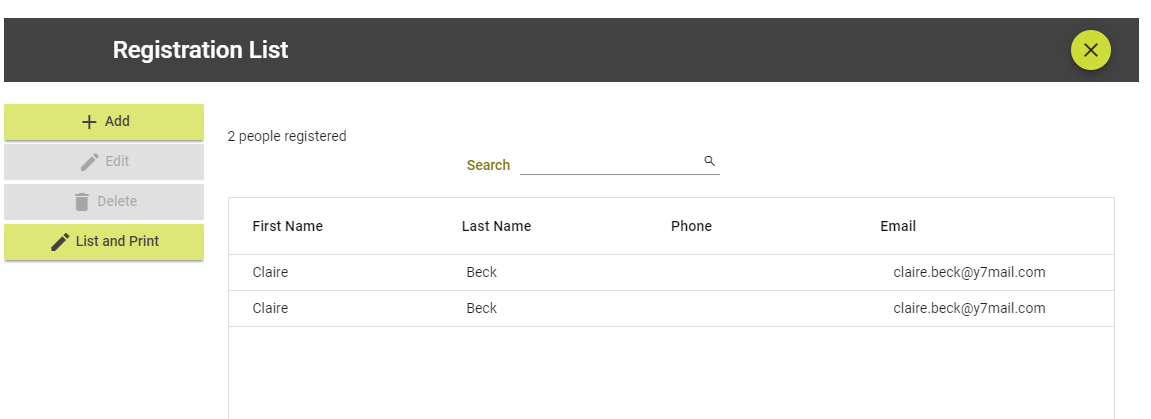
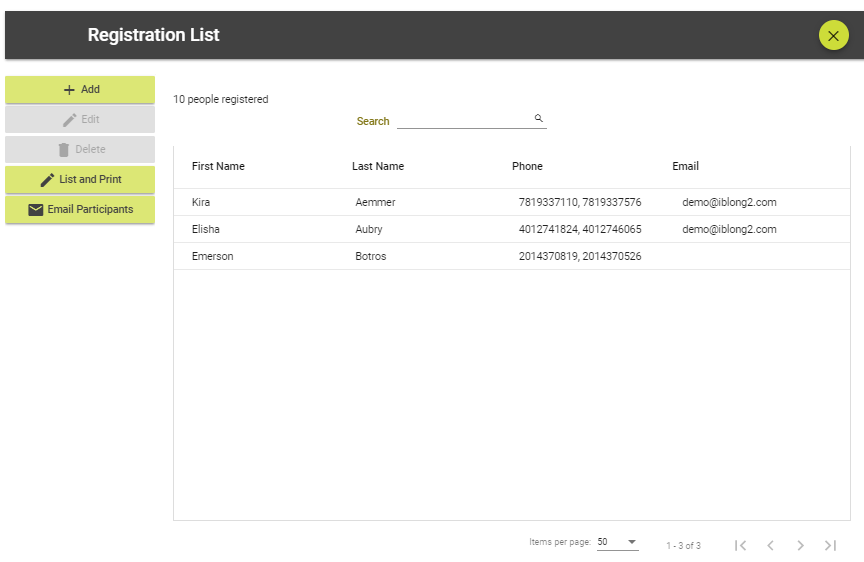
Event Registration List can now show names of people registering (328)
|
| 1/4/2026 |
1418 |
Fix input change detection bug
|
| 1/4/2026 |
1417 |
Member Edit, classes tab now has a search for class input (1805)
Fixed: Moved student - Class still shows on Print Classes (1802)
Member number appended to Direct deposit reference (1632)
|
| 31/3/2026 |
1416 |
Fix reloading page
Fixed: Time added to wait list is in the future (1806)
Fixed: incorrect message popup when confirming enrolment at checkout (1800)
Number of classes a member is in is a field in Print Member List (781)
Balance sheet, p&loss show total at all parent levels (1695)
|
| 31/3/2026 |
1415 |
Fix endless loop bug
|
| 30/3/2026 |
1414 |
Emails sent to member confirming enrolment in course now show venue (1659)
Fixed Class/events in the Members menu is not giving correct results (1700)
Ability to make date variations within a class. Tutor notes (1713)
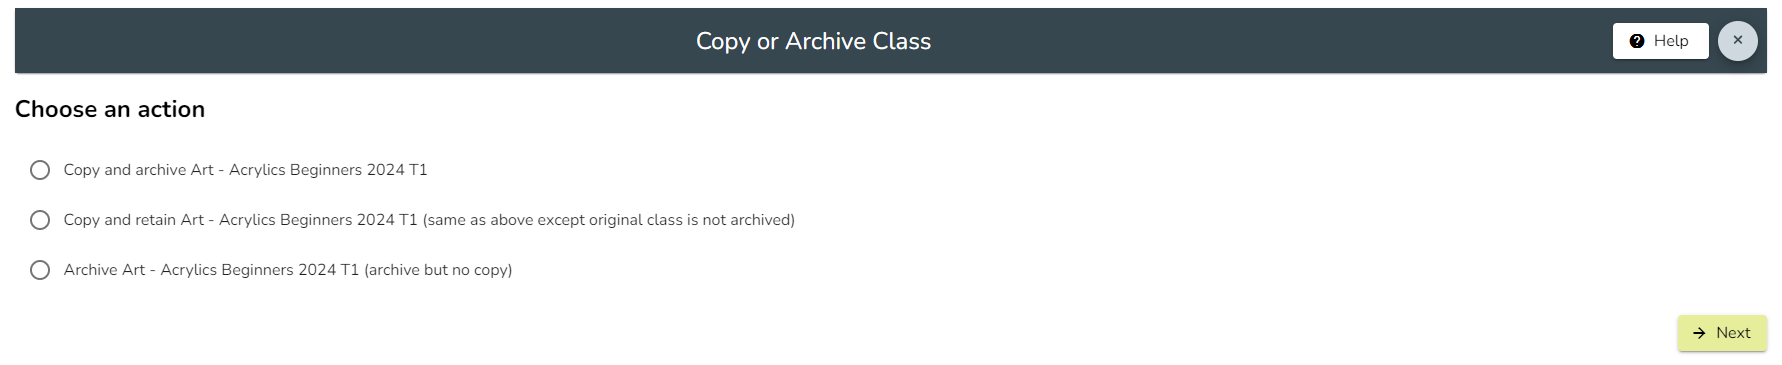
Fixed: Copy class - enrolments - date added is not date /time of copy (1768)
Emails - option to remove communication history (1469)
Fixed: Enrol online from website in class - have to confirm TsandCs (1790)
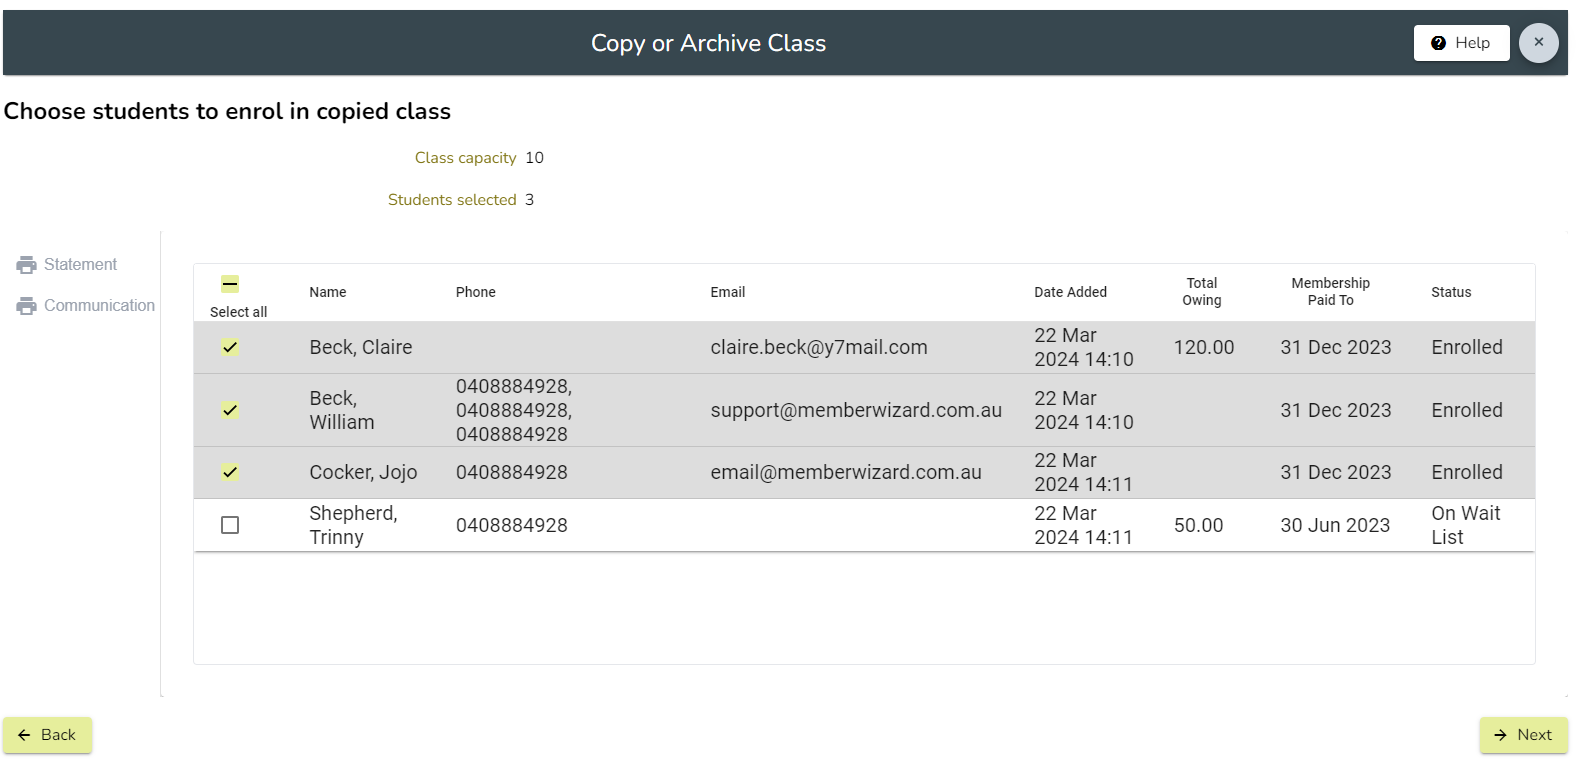
Copy Class Improvements to prevent errors (1796)
Additional columns filters added to the class list (1797)
|
| 27/3/2026 |
1411 - 1413 |
Website template pages can be bookmarked ()
Event registration List uses preferred name (1759)
Class enrolments - remove multiple at once (1678)
2nd checkout button in web class list green (1791)
|
| 24/3/2026 |
1410 |
Changed POMCCI Certificate (1775)
|
| 23/3/2026 |
1408 - 1409 |
Class Attendance list shows the removed students on the list with removed in brackets. (1778)
When an email is send to event attendees it now is recognised as a bulk email and is reflected as such in the communication history (394)
Fixed bug: no invoice when using Member Edit and moving student from wait list to enrolled (1788)
|
| 17/3/2026 |
1407 |
Display Medical Conditions on Class List is now an option in Organisation Details. New options in Print Class list:Include Invoice details, Show Tutors and Convenors in List (1596)
Tutor portal: Communications sent contains the emails that the tutor has sent.(1760)
Fixed bug in web class list where prospective student had to click twice on "Are you a member?" popup
Added Internal Notes to class import
Redesign Bulk status change process (1756)
|
| 13/3/2026 |
1405 - 1406 |
Text size on New member/Renewing Member buttons editable in web template (1734)
Enrolled date and time will be UTC (866)
Print member list has new fields: number of classes enrolled and wait list. also possible to email members not enrolled in any classes (781)
Member wallet card settings page displays logo if uploaded
Tutor portal attendance marking has option to not display removed members (1660)
Hide Event Registration close date if no registration required (1656)
Emails to different members with the same email address will be duplicated if they contain merge tags (1528)
|
| 9/3/2026 |
1404 |
Print Member List - Add Date Accepted terms conditions field and Status (1615)
Allow Duplicate emails to the same email address if sent to different names (1528)
Cancelled memberships report removed (1552)
Change Class Status page includes Start and End dates of class (1563)
Email members has new filter for members: Date Joined (1697)
Print member list total shows number on list, not total members (1305)
Add GPS coordinates to Venue location in web class list (1352)
Froala line colour (1715)
Fix Froala class description in Copy / Archive (1731)
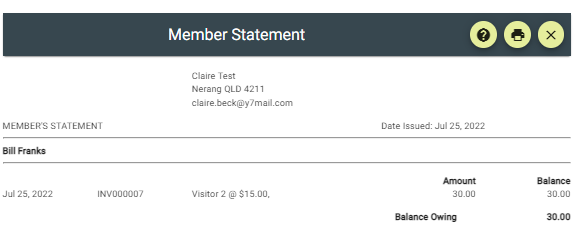
Member number now displays when an invoice is printed and when a member statement is printed (1716)
|
| 6/3/2026 |
1403 |
Correct text colour displayed in website footer (1704)
Fix print member list / name tags sort order (1711)
Event waiting list can be emailed (1443)
More accurate description of class frequency in the web class list (1712)
Tutor email in tutor portal now has a back button that returns to correct page (1618)
"Only allow online join waiting list" added to bulk class status change (1003)
Fix events not displayed in Member Portal My Events (1724)
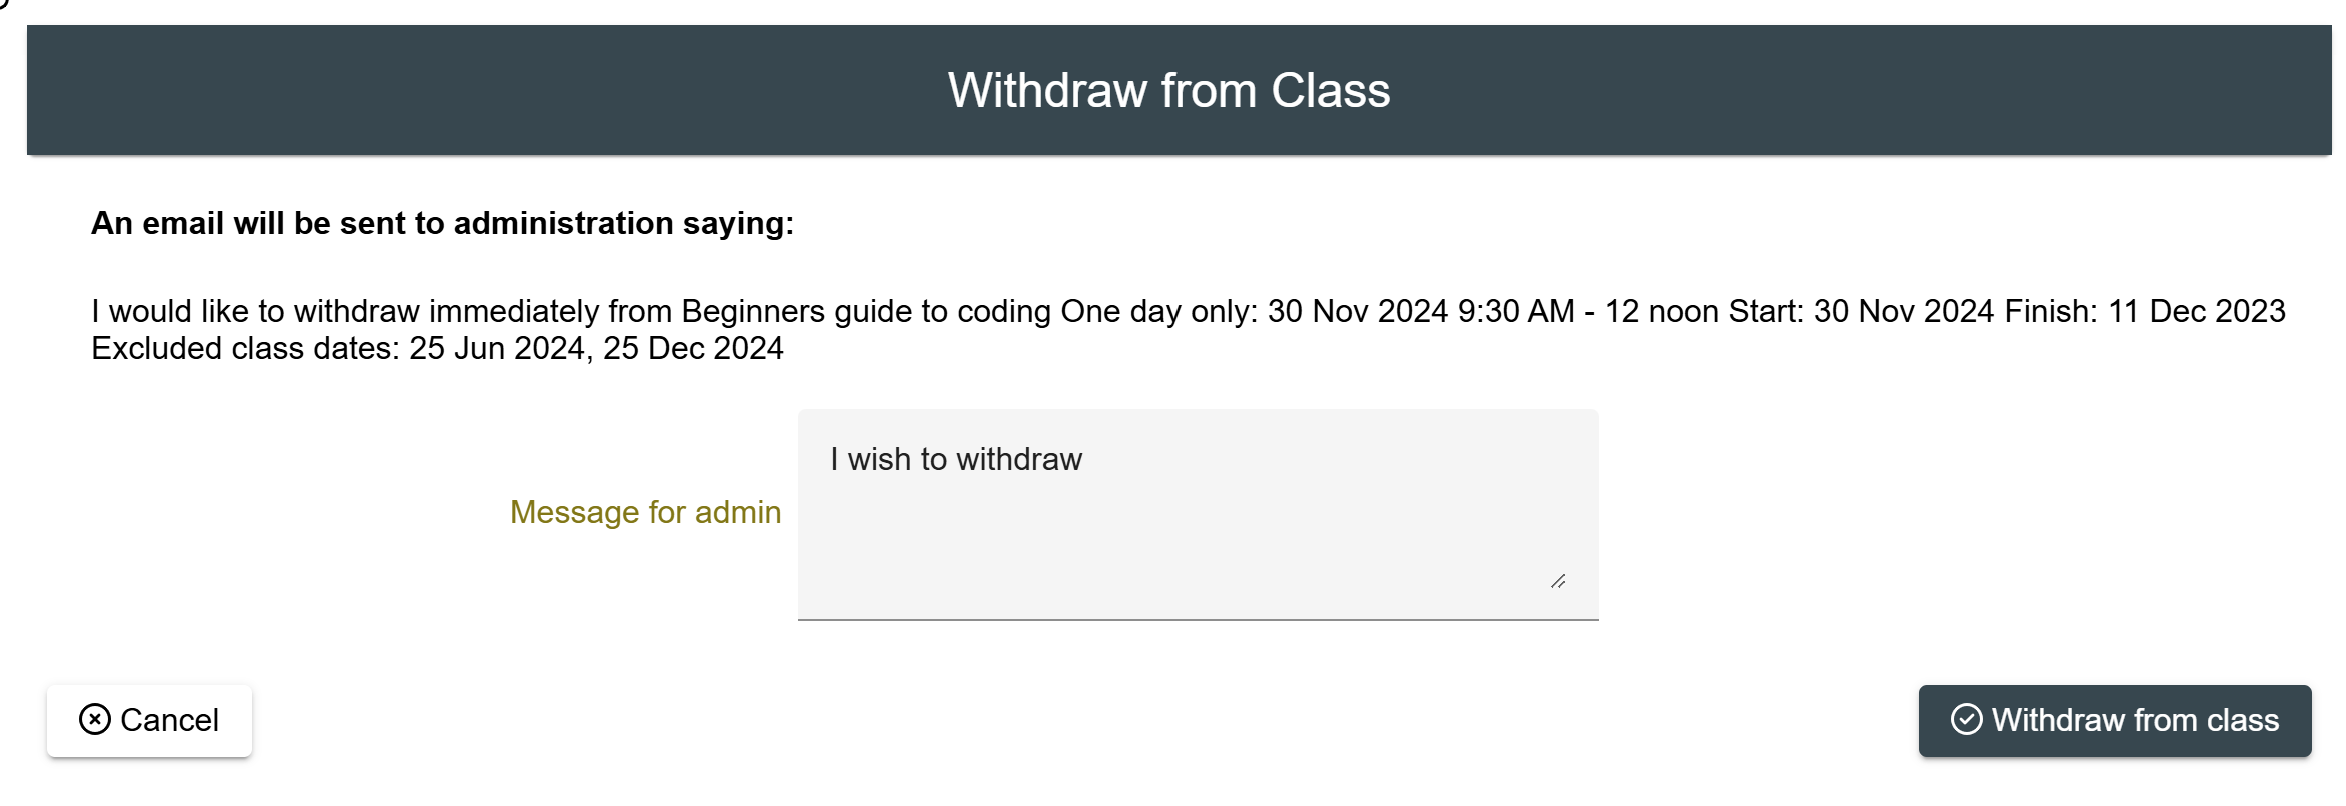
Class withdrawal requests now display in the class audit report, and not in Communications Sent (1432)
|
| 4/3/2026 |
1402 |
Option to display year on name tag (430)
Option to display emergency details on name tag (430)
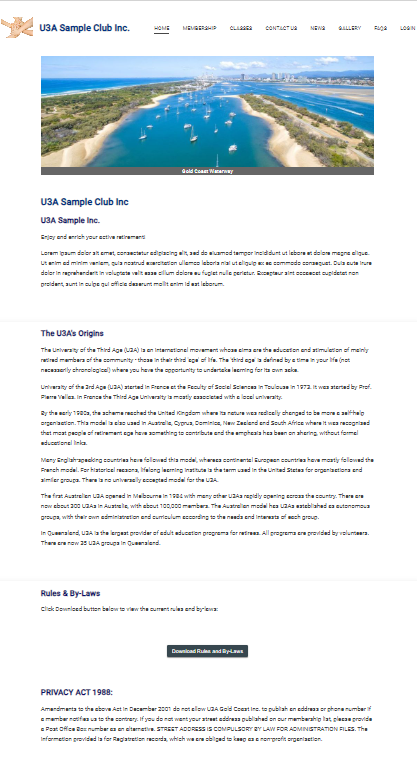
New brochure website
|
| 26/2/2026 |
1401 |
Prevent display of email addresses in Member Portal communications (1705)
|
| 25/2/2026 |
1400 |
Fix Class Attendance List print order (1673)
Class Subject: new tickbox: Always enforce subject maximum (903)
Communication History in Member Portal (1173)
Make it more obvious that a member needs to finalise enrolment (1644)
Enable "Enrol to Wait List only" to allow tutors to vet students (1003)
|
| 13/2/2024 |
1399 |
Fix Kina Bank IPG error
|
| 10/2/2026 |
1398 |
Website hamburger colour changed
New tickbox when emailing in tutor portal: Include Tutors in Email
Tutor portal email send navigates to class list
Print event registrations prints in name order
New Organisation setting: Allow Tutor To Edit Class Size. If ticked, then tutors can edit class size in the tutor portal
|
| 3/2/2026 |
1397 |
Angular 21
Fixed Attendance sheet data issue that was over working the database
|
| 29/1/2026 |
1396 |
Form labels are darker for accessibility
Current and historical classes events for a member can be viewed from the Member List (1198)
Welcome letter is now sent when a member joins by choosing classes in the web class list (1567)
|
| 23/1/2026 |
1395 |
Fix bug that sent emails to the wrong people
Disable the calendar in the Web Class List if all classes are online
|
| |
1393 - 1394 |
Added option for ACDT and AEDT timezones in Class audit report
If an event is deleted members registered for the event to be notified.
When Disable Organisation Excluded Dates is ticked on a class, don't display them in My Classes
New report: Renewing Paying Members(1545)
|
| 15/1/2026 |
1391 - 2 |
Fix: Print Member List - class option includes withdrawn students (1056)
A photo can be added to the member record (1390)
|
| 9/1/2026 |
1390 |
Fix display labels in Email Tutor (1534)
Members can request removal from event in the Member Portal (1349)
Fix display of member name on S700 reader (1548)
|
| 06/01/2026 |
1389 |
Fix Member Portal page not found bug
Validate Membership year end day depending on month
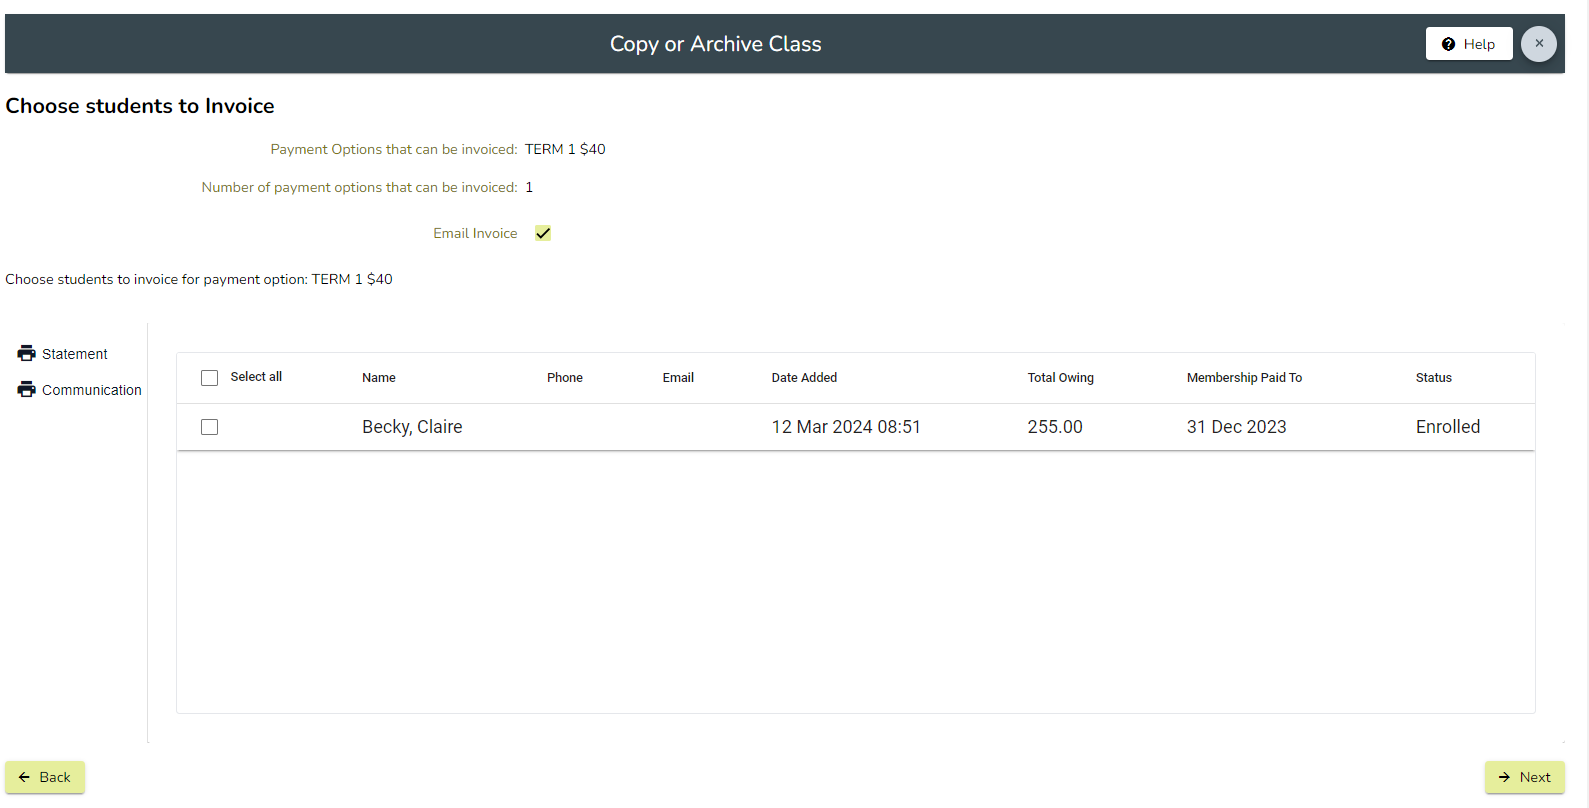
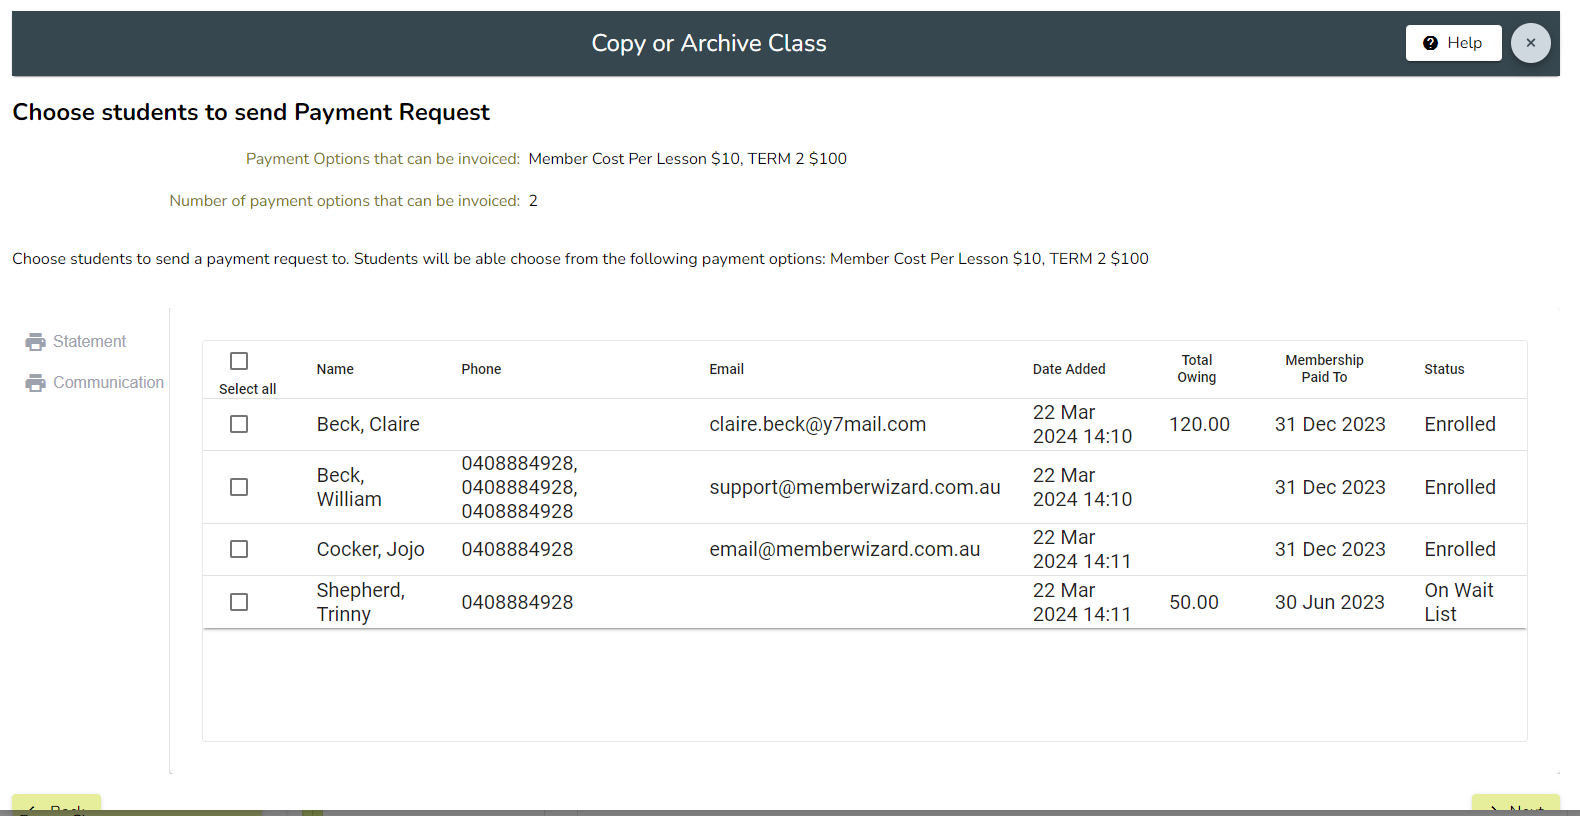
Only send Payment Request if money is owing
Change message if more than one member with an email address
More options when printing class / waiting list
Prevent early enrolment group from enroling in more than maximum for a subject
Enforce class maximum at point of save to database
|
| 1/1/2026 |
1388 |
Member name shows on S700 card reader
Event attendees can join as a new member
Event attendees cannot renew their membership
Remove internal notes from tutor portal class list
|
| 31/12/2025 |
1387 |
Venue list displays address, capacity
Venue list can be exported to excel
Moved students remain on class list / attendance sheet with date moved displayed
Totals in enroled students display correctly
Recipients in student portal email show names / email address
|
| 22/12/2025 |
1386 |
Print name tags: can select a subset of members
Profit and Loss displays a budget column
Tutor names and office email addresses are displayed when a member emails from the member portal
Members can see details of an event that they are registered for in the Member Portal
|
| 15/12/2025 |
1385 |
Fix enrolment period class count bug
|
| 12/12/2025 |
1384 |
Fix Web template open link in new tab issue
Fix date range of membership invoices
Website: Added SubMenu for Smaller Screens
Fixed Froala Colour Issue
Print member list now has an option to print enroled or waiting list students
|
| 9/12/2025 |
1383 |
Fix attendance sheets for ongoing classes
|
| 8/12/2025 |
1382 |
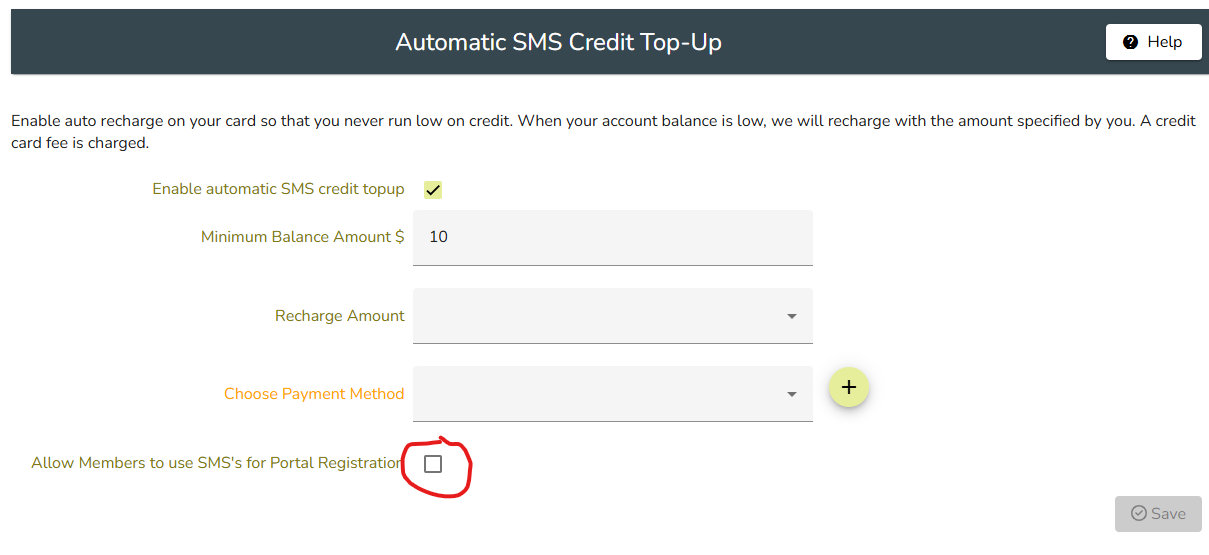
Member Portal SMS requests will be totalled in a new field that can be printed / exported in Print Member List
You also will be able to see the name of the member making a Member Portal SMS request in Communications sent
Fixed bugs in maximum number of enrolments in a subject
Also, maximum number of enrolments in a subject now applies to joining wait list
Stripe Bank Account removed from dropdowns to prevent misuse
Class timetable has additional sort and filter selections
My Classes shows only relevant excluded dates
|
| 2/12/2025 |
1380 - 1381 |
bug fixes
|
| 29/11/2025 |
1379 |
Roll back to Angular 20. Paste Word into Froala does not work in 21
|
| 29/11/2025 |
1378 |
Angular 21
|
| 28/11/2025 |
1377 |
Create membership Invoice: if email is un-ticked, then members without email addresses are included
Users must have full permission in Money or Members to be able to save a receipt or invoice
When a class is copied and made inactive, students will now receive emails re enrolment in the new class. Tutors do not receive emails
Export to excel in Classes / Attendance now includes Member Number
Fix errors in Email Pay Owing
|
| 26/11/2025 |
1376 |
Remove universal excluded dates from web class list
There are 2 new fields in Settings / Organisation Details / Members:
Days before Paid To Date membership invoice allowed
Prevent invoicing membership when a member is invoiced to next year
These fields enable organisations to control when their members are able to create and invoice for another membership period
|
| 22/11/2025 |
1375 |
Fix email invoice bug
|
| 20/11/2025 |
1374 |
Tutor portal email now has tickboxes: Copy coordinator, Copy convenor, Copy office
Don't show organisation excluded dates in class brochure if Disable Organisation Excluded Dates is ticked
Display preferred phone in member list
Web class list shows "No cost" when the class is free
Radio buttons easier to see
|
| 19/11/2025 |
1373 |
Display custom fields in Member Portal depending on membership type
Tutor Portal attendance totals corrected
In the website template add an option to log into the Member Wizard Admin Portal.
Class brochure has Table of Contents with page numbers
Class frequency restored to Class Brochure
Print bulk attendance sheets start and end dates corrected
Event Attendee Membership Type can have it's tickboxes edited
Email Membership Invoice - option to generate invoices and not email
|
| 15/11/2025 |
1372 |
Class Audit report in Classes menu
|
| 12/11/2025 |
1371 |
If an organisation has terms and conditions in the New Member Application, they are displayed at the bottom of emailed membership invoices
When a membership invoice is paid by Stripe, the member's Agreed to T&C date is updated
Classes brochure has Table of Contents
|
| 10/11/2025 |
1370 |
Tutors only emailed absence advices if the class is in the future
Display of Advised absence corrected
Include option to display Mobile phone number on Member list
Option to not include Event Attendees in Member List
Print and email invoice only titled "Tax Invoice" if registered for GST
Bulk Attendance sheets and be printed for inactive classes
|
| 7/11/2025 |
1369 |
Able to edit the phone number and email address in the event registration form
Improvements to Class Brochure
|
| 6/11/2025 |
1368 |
Import classes module can import Class Convenors
Announcements can be filtered to clients using Member Wizard Website Template
Adjustments to Class Brochure
|
| 3/11/2025 |
1367 |
Members created by the Fund Raiser app are given a Membership
Type of Donor
Web Class list can be filtered by class name
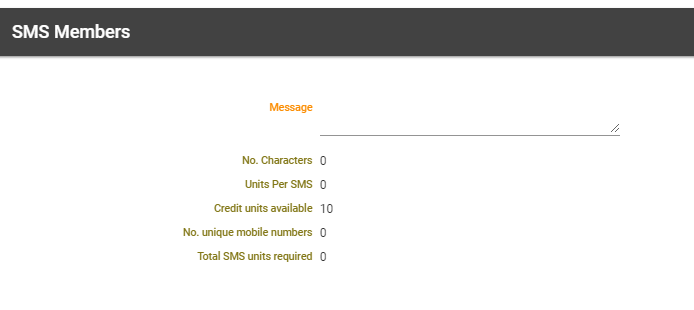
It is now possible to SMS members who owe money. SMS Members has a new filter.
The website template can now have an Menu item "Member Login" which opens the member Portal
|
| 30/10/2025 |
1366 |
Send email: tutors can be filtered by venue
Email notifications to tutors and convenors can be disabled when the students submit absence advices
Membership types can now include 2, 3 and 5 years
|
| 29/10/2025 |
1365 |
Enable Stripe in NZ
|
| 28/10/2025 |
1363 - 1364 |
Fix excluded dates for attendance sheet
Show C on attendance sheet
|
| 25/10/2025 |
1362 |
Change the way Country and Postal Country are stored
|
| 24/10/2025 |
1361 |
Fix register for event error
Footer show on every page of attendance sheet
Extra space at top of attendance sheet
Absence advice emails no longer appear in communications sent
Absence advice emails are not sent to person entering them
Absence advice emails are not sent if the data entry is after the class start
|
| 23/10/2025 |
1360 |
Fixed email sent when person added to event waiting list
Date added to event waiting list displays in list
Prevent deleted payment types from displaying in event registration form
|
| 20/10/2025 |
1358 |
Froala no border style
|
| 19/10/2025 |
1357 |
Angular update
|
| 17/10/2025 |
1356 |
Fix attendance sheet. Future unmarked dates show blank
|
| 14/10/2025 |
1354 - 1355 |
Add field for ISO Currency Code in Organisation Details to enable international clients using Stripe
Can now email Tutors or Tutors and Convenors
Attendance totals appear in a total for each date for Print Attendance sheet
Allow Online enrolment tickbox hidden for online classes in Edit Class
|
| 13/10/2025 |
1353 |
For an enrolment period, a class start date can be entered. Restrictions only apply to classes starting after this date
Internal notes field added to class. Visible in tutor portal and export classes
On the page where the tutor marks attendance, instead of a single tickbox, there are 3 radio buttons for each member: Present, Absent and Advised Absence (defaulting to Absent unless the student has previously advised absence)
Tutors are now able to view 'inactive' classes via their Tutor Portal
Member statement default to reverse date order.
|
| 10/10/2025 |
1352 |
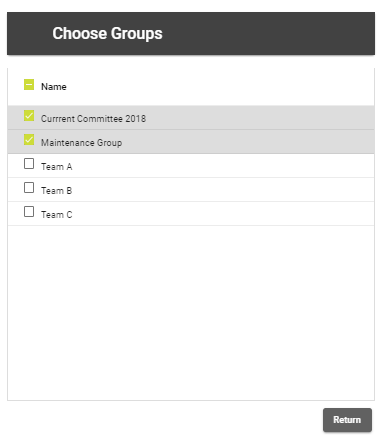
Members of a group now appear in the Groups list under the View Group members page menu item.
Class Attendance sheets now show the GPS coordinates of the venue so in cases of emergency those details are easily available to the tutor. The will next be added to the web class list to aid members locating venues.
Email invoice on save shows the correct date in Communications Sent
All communications sent show time as well as date
|
| 9/10/2025 |
1351 |
Add membership period invoiced to Renewing Member invoice line
Fix email event message height
Help file for Change Tutor Status
Web class list: Include Online classes when Classes with places available ticked
|
| 8/10/2025 |
1348 - 1350 |
In lists of events, an event is current if it's end date is not in the past
Store permissions securely in memory
Froala fixes
|
| 7/10/2025 |
1345 - 1347 |
Fix bug where renewing inactive member is invoiced to the end of the wrong year
New filter on web class list: Classes allowing online enrolment
Fix member portal renew membership
Import classes: time can be separated by - or :
Communications sent for invoice: time included in date
Angular version 20
|
| 29/9/2025 |
1344 |
If an enrolment period is configured, only classes with over-lapping start and end dates are counted towards total enrolments
|
| 22/9/2025 |
1343 |
Hide New Member Instructions for update contact details form
When an event registrant is moved to or from Wait list or is removed, emails are sent to event organiser and registrant
First and last name mentioned in enrolment email to prevent confusion where people share an email address
|
| 19/9/2025 |
1341-1342 |
Prorata membership fees for new members can now be fixed to a percentage of the full fee
Add a link in the admin portal Website page: Working with the Member Wizard Template - a Handbook
Fix PDF upload panel in website template
|
| 17/9/2025 |
1339-1340 |
Fix Froala links
Include webp in image types
Fix end date for 6 month memberships
Fix Tutor portal button width
Fix class timetables
|
| 14/9/2025 |
1338 |
Angular 20
|
| 13/9/2025 |
1337 |
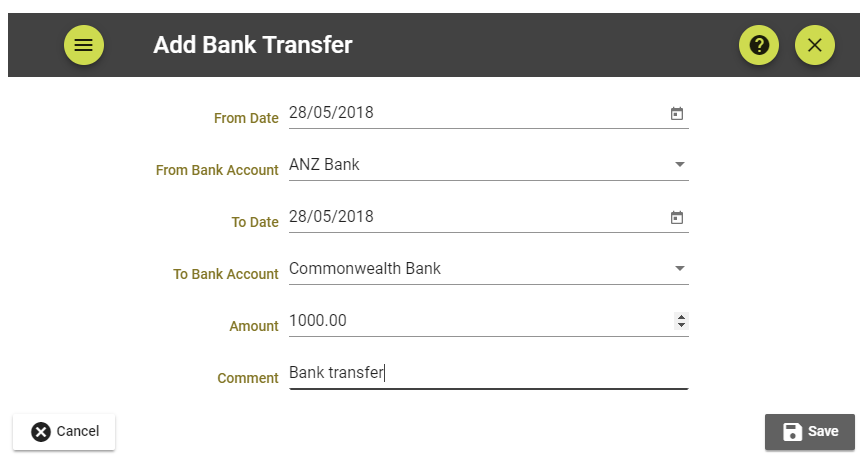
Prevent changing the bank account and date on Bank Transfer, Deposit and Expense when editing to prevent Bank reconciliation errors
Prevent importing duplicate member numbers
New members do not get sent a $0 invoice if there is nothing to pay
Don't allow Event Attendee membership type to enrol in classes
Horizontal alignment attribute added to all website panels
|
| 6/9/2025 |
1336 |
Information about device, browser and OS type logged at login and when code errors occur to help with support and error reduction
|
| 5/9/2025 |
1335 |
A custom email address can now be added in custom fields. This email address can be chosen when in Email Members, Email Event, Email Newsletter and Email Students and Tutors
|
| 3/9/2025 |
1334 |
Enable classes scheduled every 3 weeks
Fix bugs that caused problems with excluded date ranges when start or end of daylight saving time was included
|
| 2/9/2025 |
1333 |
My events sort order changed to start date ascending
Make start and end date required for profit and loss report
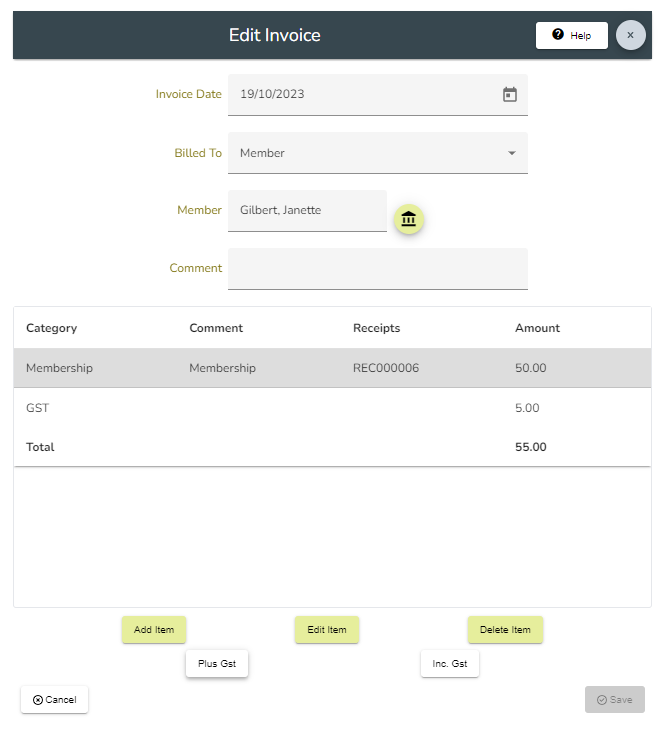
If the Inc. GST button is clicked on a receipt, adjust the invoice amount as well as the receipt.
Don't display GST buttons if the receipt line is already invoiced
Display newsletter list in reverse creation order
Allow front desk to create invoice: remove money permission from LoadMemberInvoiceDetails
|
| 29/8/2025 |
1332 |
When importing classes, selections are preserved if the file is re-imported
When importing account categories, selections are preserved if the file is re-imported
Fix bug in Change Tutor Status
Register for event: default ticket quantity to 1 if there is only one ticket type
|
| 21/8/2025 |
1331 |
Custom fields can be limited by Membership Type. This means that when a new member is entering their details, they only see the custom fields that are relevant to their Membership Type
Print and Email Invoice displays the member's organisation
Move from wait list to enroled list: time added to date moved
Fix tutor portal communications sent date display and date range selection
|
| 21/8/2025 |
1330 |
Hide Upload Document button when editing a document
Member Portal contact details are displayed as arranged for new member form
Fix bug in Member Portal document access permissions
Warning message when restricting access to a folder: "This limitation only applies to documents in this folder. It does not apply to documents contained in sub-folders"
|
| 20/8/2025 |
1329 |
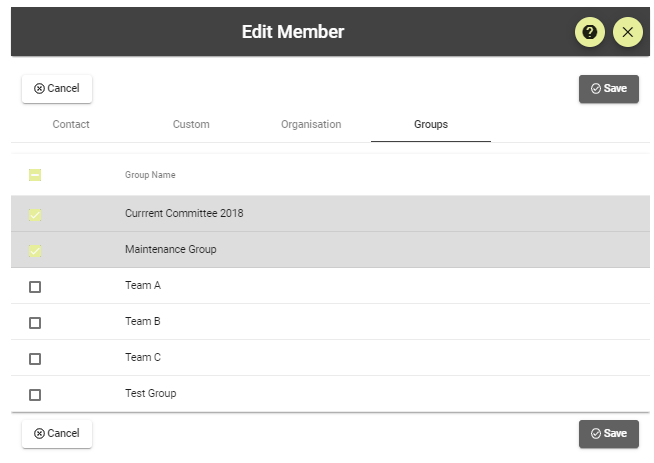
Option added to groups that allows members to view groups they belong to but are not allowed to edit
The Facebook panel on the website template now accepts Facebook Groups
|
| 17/8/2025 |
1328 |
Future saves in Communications Sent will have time as well as date, and are displayed in reverse date / time order
Reference for Direct Deposits is now invoice number(s) instead of member's name
When deleting a class:
- an enhanced confirm message is displayed warning about associated items deleted
- if a class has paid invoices then a message is displayed and the class is not deleted
- unpaid invoices are deleted
|
| 15/8/2025 |
1327 |
Website template can add a facebook panel
Add Find And Replace to Froala html editor
A Document folder can be edited to limit access. Members with selected Membership Types and / or belonging to selected groups will be able to see the folder in the Member Portal
|
| 12/8/2025 |
1326 |
Now able to configure who receives email inquiries from the website
A custom field may now be a group of radio buttons
|
| 8/8/2025 |
1325 |
Load of web class list optimised
SWIFT code can be entered for international transfers
Add Bulk Status Change Function to Tutors & Convenors
|
| 7/8/2025 |
1324 |
Prevent duplicates in member list
Apply the same rules for enrolment period total classes to waiting list
Attendance sheet text in box now prints black, not dark gray
Fix bugs in tutor portal communications sent
Prevent deactivation of Membership Type if it is the New Member default membership type
|
| 6/8/2025 |
1323 |
Medical conditions are now shown on Print Class
Tutor can view View Communication Sent History with Tutor Portal
If a member belongs to an early enrolment group a message is displayed on the home page of the member portal
|
| 5/8/2025 |
1322 |
Group label changed from "Show on Reminders and Online Applications" to "Visible to and editable by member"
Fix: Absence entry - Admin cannot enter backdated entry
Prevent attempting to log in to 2 organisations at the same time.
Added a date / time prefix to the most recent portal action field to enable sorting by date and time.
Update student date added when moved from wait to enrol
Attendance sheet will only display removed students if they were removed after the class start
Email sent to new member is now included in Communications sent
|
| 1/8/2025 |
1321 |
Enable import member spreadsheet reload. If a spreadsheet is edited and reloaded, the column choices are preserved
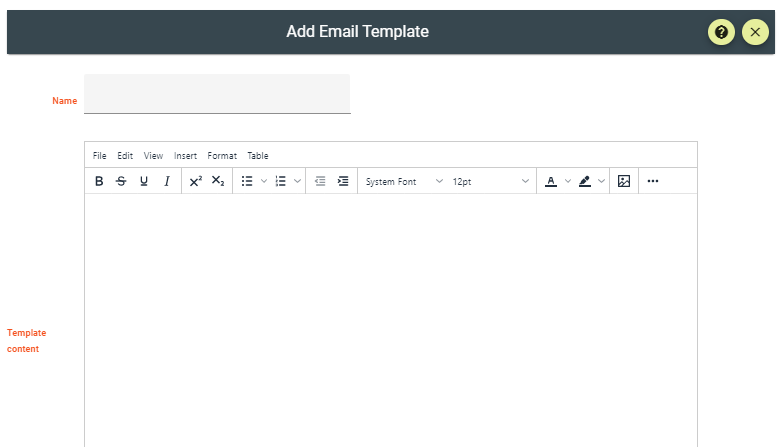
Enable insert template at Froala cursor (previously a template could only be placed at the end of the text)
Attendance sheet changes as per ticket 936
Mark Attendance form now has select all and un-select all buttons
Allow duplicate email addresses in Email Members
New Member merge tags bug fixed
|
| 31/7/2025 |
1320 |
Restore Advice Absence in My Classes in Member Portal
Order of files in Documents folder can be reversed
|
| 30/7/2025 |
1319 |
Resources can now be added to an event. These can be viewed in the Member Portal by members registered for the event
Bug fix: Class timetables now allow selection of all active classes
|
| 29/7/2025 |
1318 |
Account Categories / All Transactions optimised to produce much faster result
New tickbox in Edit Event: Close registration after RSVP Date. If ticked, then registrations cannot be done online or in the portal. They can only be done in the Admin Portal
|
| 29/7/2025 |
1317 |
Prevent changing the name on an invoice
Prevent accidentally moving student from enrolled to wait list in admin portal
Correct notification when student moved from waiting list to another class is now sent to tutor and student
|
| 24/7/2025 |
1316 |
Add additional debug info to help fix portal registration errors
Enable add notes to student enrolment
The restriction on enrolment in classes for a subject is applied to both enrolment and join the waiting list.
Fix search by Member Number bug
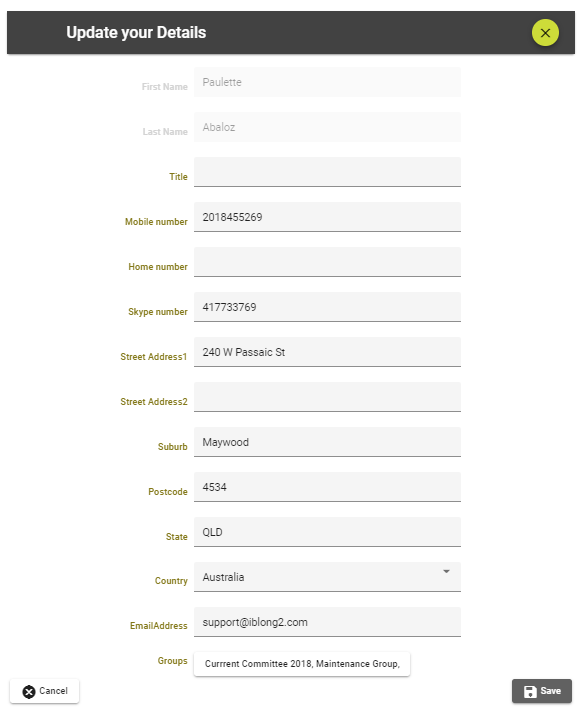
All contact fields displayed in member portal Change My Contact Details page
|
| 23/7/2025 |
1315 |
When replacing merge tags, use first name if the preferred name is empty
Allow 'All' permissions to create an invoice
Event email can now have a preamble with merge tags
Fix prorata membership charge for a member with no paid to date and no invoiced to date
|
| 22/7/2025 |
1314 |
Events listed in the web class list now show start time
Event details are optionally displayed in the web class list
Preferred Name custom field data moved to standard field
Fix bug in unsubscribe
New Member email can now use merge tags
Email all event invoices
|
| 21/7/2025 |
1313 |
Notes added to Assessor List
Fix bug in Student List where it is possible to select Move to Enrolled list when no student is selected
Only display "GST" in automatic receipt and invoice line description if GST Category name does not include "GST"
|
| 19/7/2025 |
1312 |
Prevent demo user using save button
Office Staff are able to Delete an Absence Entry
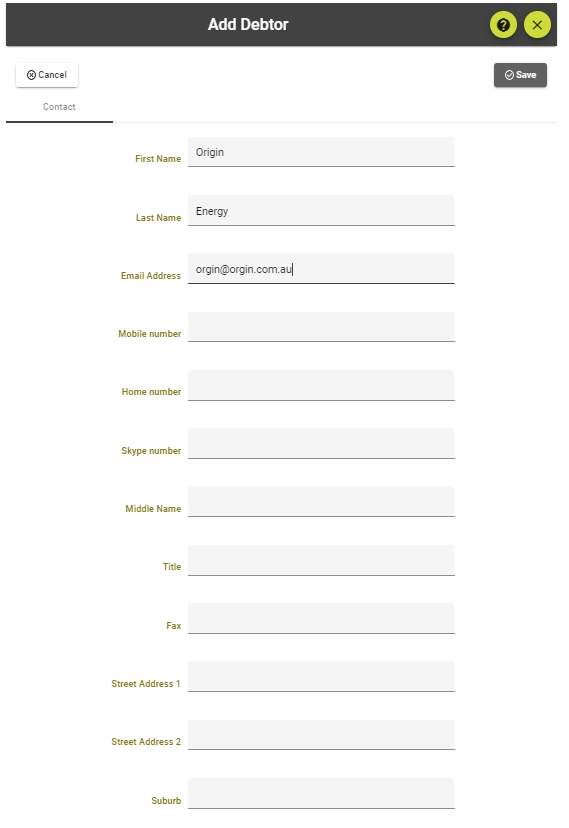
Fix bug in Add Debtor
|
| 18/7/2025 |
1311 |
Classes Calendar View sorted by start time
Sort class audit report descending date
Class audit report option: Include Absence Entries
Register for Event email address can now be required. (Tickbox in Edit Event)
New standard fields Preferred Name, Postal Address1, Postal Address2, Postal Suburb, Postal Postcode, Postal State, Postal Country
New Merge tags: Preferred Name, Member Number
Prevent display of groups in Member Portal where "Show on Reminders and Online Applications" is unticked
|
| 14/7/2025 |
1310 |
Fix Web Class List error
|
| 14/7/2025 |
1309 |
Time zone added to event date / time
Re-format registration emails sent to event organizer and participant
Optimise load of Invoice list
Load Announcements list in reverse date order
|
| 11/7/2025 |
1308 |
Increase font size for members in print attendance sheet
Removed obsolete interactive walk-through that new organisations see. It will be replaced by a packaged solution
Announcements list loads in reverse date order
|
| 10/7/2025 |
1307 |
Delete Invoice changed to not remove a students enrolment
Allow members to renew via website with member number
Correct paid to date when the only membership receipt on a member's statement is deleted
Fix budget report print
|
| 9/7/2025 |
1306 |
Add time zone conversion to class audit report
Class date error message moved and changed to red text
Prevent double email to tutor when student withdrawn
Events are allowed to have a non-member as contact
Names for classes and tutors displayed in member facing apps can be edited
|
| 8/7/2025 |
1305 |
New buttons in Change Class Status: Suspend / Resume Tutor gets email when a student enrols or leaves, Suspend / Resume Convenor/Class Admin gets email when a student enrols or leaves
|
| 7/7/2025 |
1304 |
Member list email now displays email status (bounced etc)
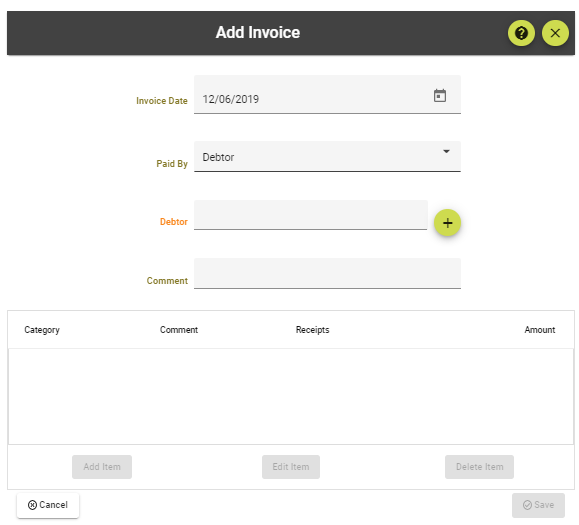
Add / Edit Invoice display a tickbox "Email Invoice"
Students in the portal can only advise absence for future dates
|
| 4/7/2025 |
1303 |
Fix date range description in invoice and receipt membership lines
|
| 3/7/2025 |
1302 |
Enable Unsubscribe in Import Member Spreadsheet
|
| 2/7/2025 |
1301 |
Fixes for budget
|
| 1/7/2025 |
1299 - 1300 |
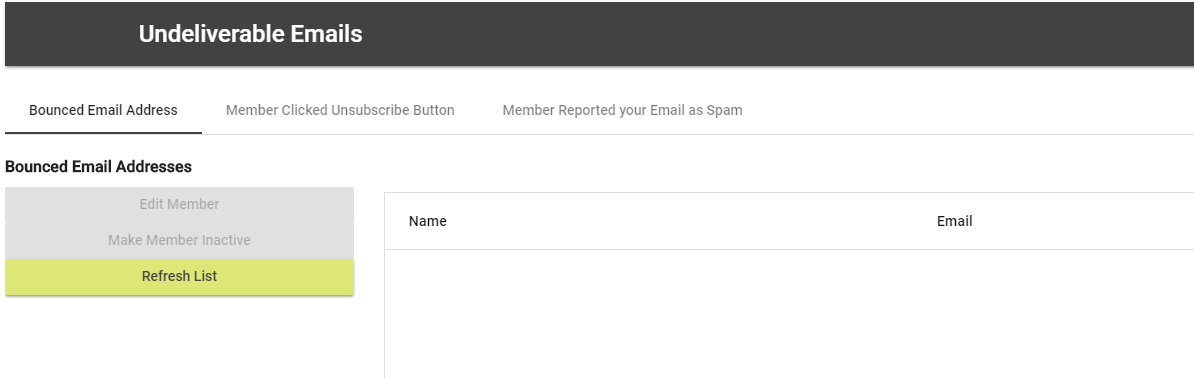
Unsubscribe app requires a member to click a button before they are unsubscribed
Undeliverable emails page now has a button "Unsubscribe Member" that enables the user to select a member to unsubscribe
Fix date range for budget
New type of custom field: Long Text allows display and edit of text more that a few words long
Fix delete category
Invoices produced by printing reminders now go on the transaction audit report
|
| 28/6/2025 |
1298 |
Attendance sheet arranged in first name order in the Tutor Portal and last name order in Member Wizard admin
|
| 27/6/2025 |
1292 - 1296 |
If a member is unsubscribed they will no longer be sent emails sent from Communication / Email Members, Communication / Newsletters and Events / Email. They will be sent all other emails
Add forgot password link to login pages of portal
Added Budgets module
Enhancements to Attendance sheet print
Removed excluded dates from web class list that are outside class date range
Show merge tags only where they are relevant
Correct Froala table editor popup position in dialog
Added link: Learn about password managers
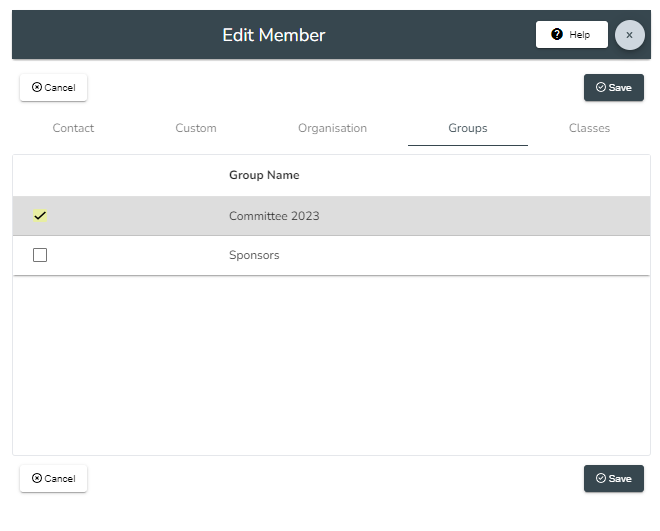
Classes tab in edit member: tickbox "Enrolled classes only" cnaged to "Enrolled and waitlisted classes only"
Portal: members can see which groups they belong to, including early enrolment groups
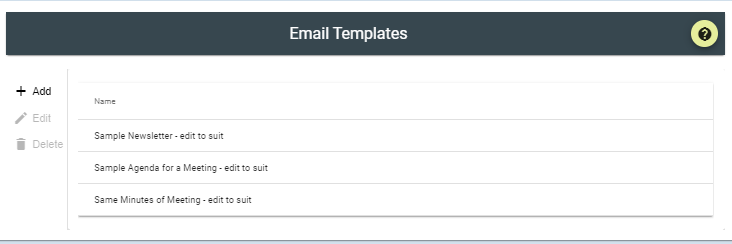
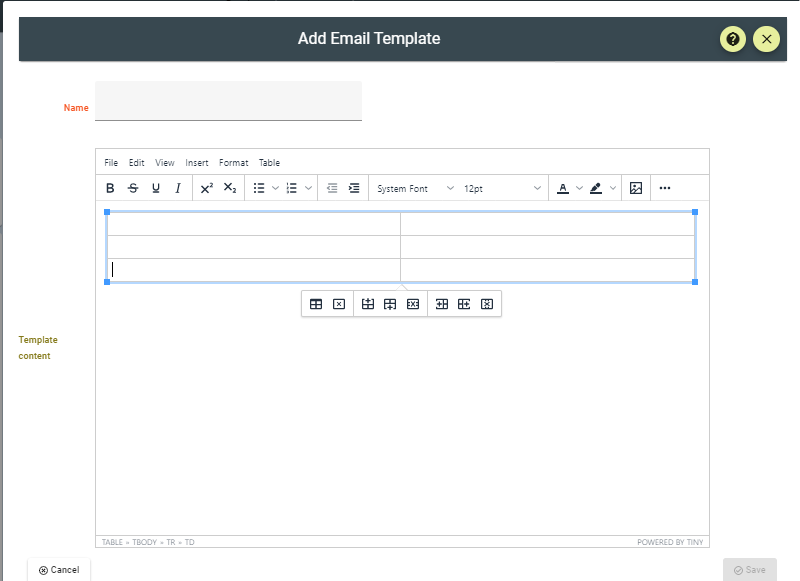
Email template list searchable
Attendance sheet arranged in first name order
Prevent student appearing twice ina class when moved from another class
Remove spacing from email footer
Delete class audit when member or class is deleted
|
| 13/6/2025 |
1287 - 1291 |
Add 'Organisation' to mail merge tags
Adjustments to http retries to prevent errors
Copied classes now have a fresh copy of the original resources
Class audit report
Class attendance export
Fix froala image bug
Labels for Organisation, Postcode and State can be edited
Enrolled student count Print Attendance Sheet fixed
Allow GST-free tickbox for all categories
Enrolment Period statement in web class list modified
|
| 5/6/2025 |
1286 |
Tickbox on edit Membership Type: Allow Member to Enrol in classes.
Remove contact names from email notifying event organiser of a registration
|
| 5/6/2025 |
1285 |
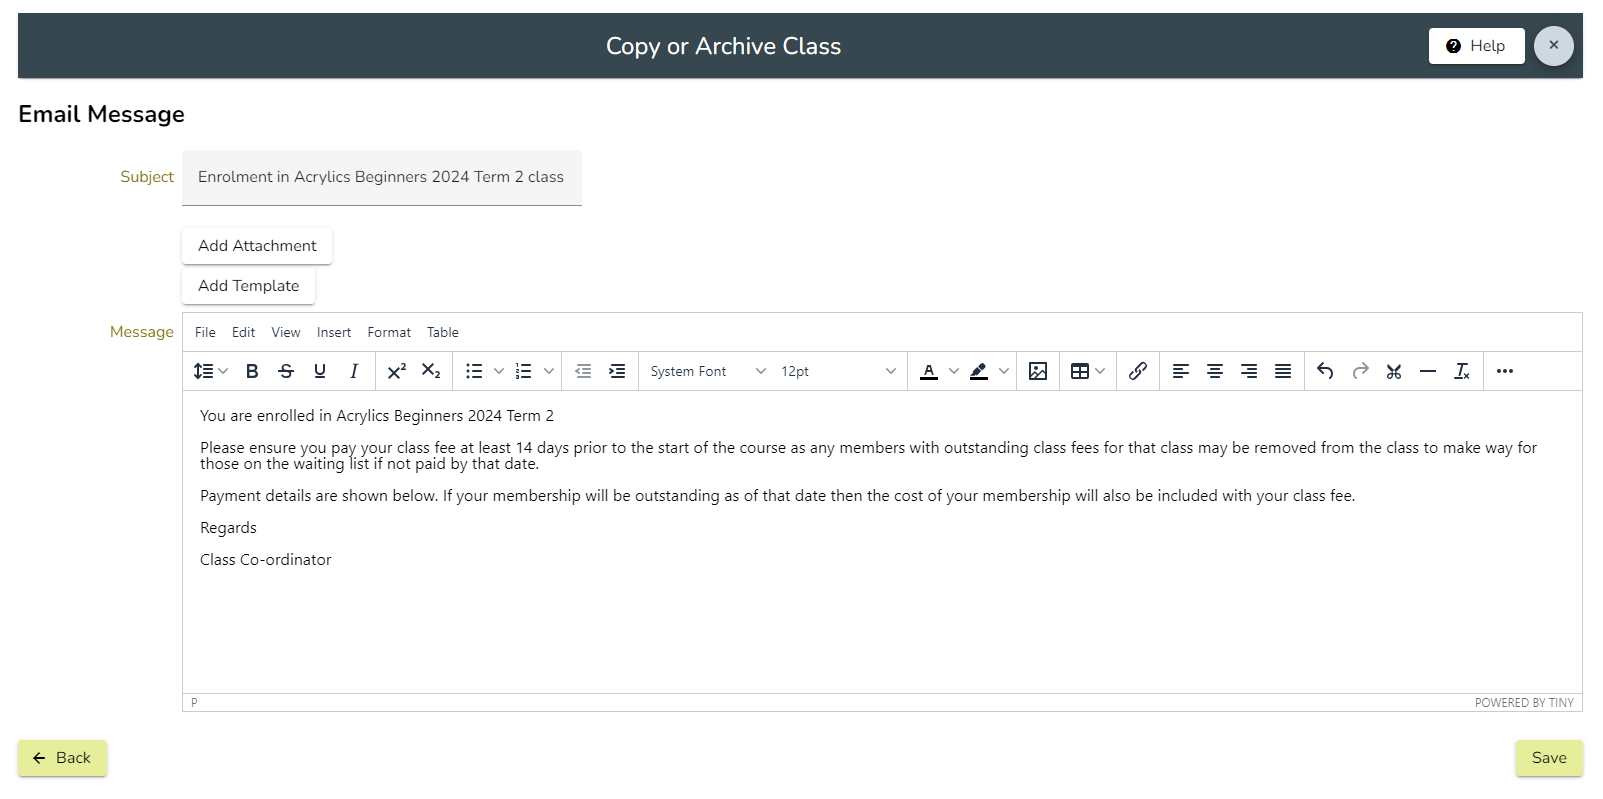
Send email to students when class is copied
|
| 4/6/2025 |
1284 |
Allow user with full member permissions to manage classes in Edit Member
Enrolled students list: Update the "Number of Students" in the heading row to always show the Number Enrolled, Max Number and Number on Wait List.
Merge tags icon
Fix email event from portal bug
|
| 3/6/2025 |
1281 - 1283 |
Merge tags are available in Email member
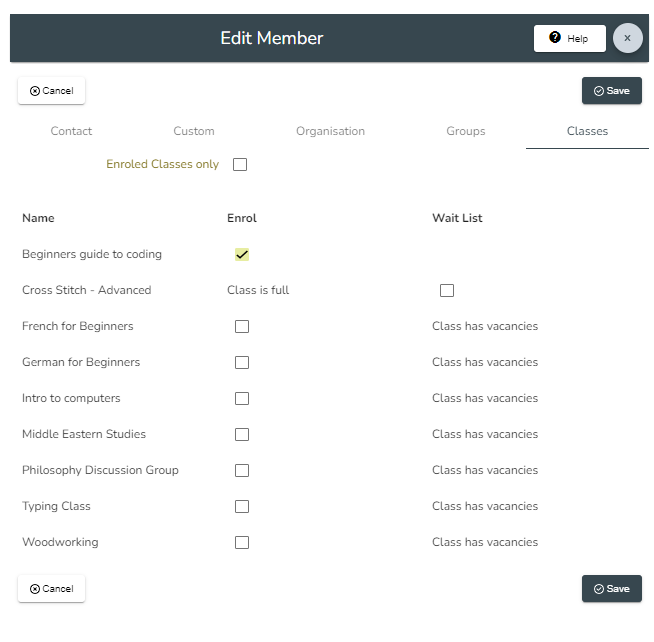
When editing a members classes show the number on the wait list even if that class has vacancies.
Member audit report can be exported to excel
Tutor's name added to the attendance sheet to be marked present
Events panel added to the website template
|
| 26/5/2025 |
1280 |
Date and time of unsubscribed emails visible
Events panel in website template
|
| 21/5/2025 |
1277 |
Maximum document size set to 20 MB
Fix delete event bug
Fix student email for single day classes
Put Organisation into Print member List
|
| 20/5/2025 |
1276 |
Student enrolment emails can be suspended at the class level. This is available for bulk change in Classes Status Change
|
| 19/5/2025 |
1275 |
In the portal, tutors can transfer students between their classes
From now on, removed students will remain on the attendance sheet (marked as Removed)
|
| 17/5/2025 |
1274 |
Hide admin only payment types in register for event
|
| 15/5/2025 |
1273 |
System Categories can have their name edited
Class Fee invoices are saved in the transaction audit when the enrolment data entry is completed in Member Wizard (not the portal or web class list)
|
| 14/5/2025 |
1272 |
Fix display Website Link
Update Date accepted Terms and Conditions when a member ticks Agree
Display Organisations is now configurable
|
| 13/5/2025 |
1268 - 1271 |
Enable yyyy-mm-dd format in import member spreadsheet
Statistics reports
Can now import date added to waiting list
Blank line on attendance sheet has extra height
Fix misleading password strength
Prevent over-enroling during Enrolment Period
Fix bug: Online class does not invoice cost in web class list
Refresh Email Template list after close popup
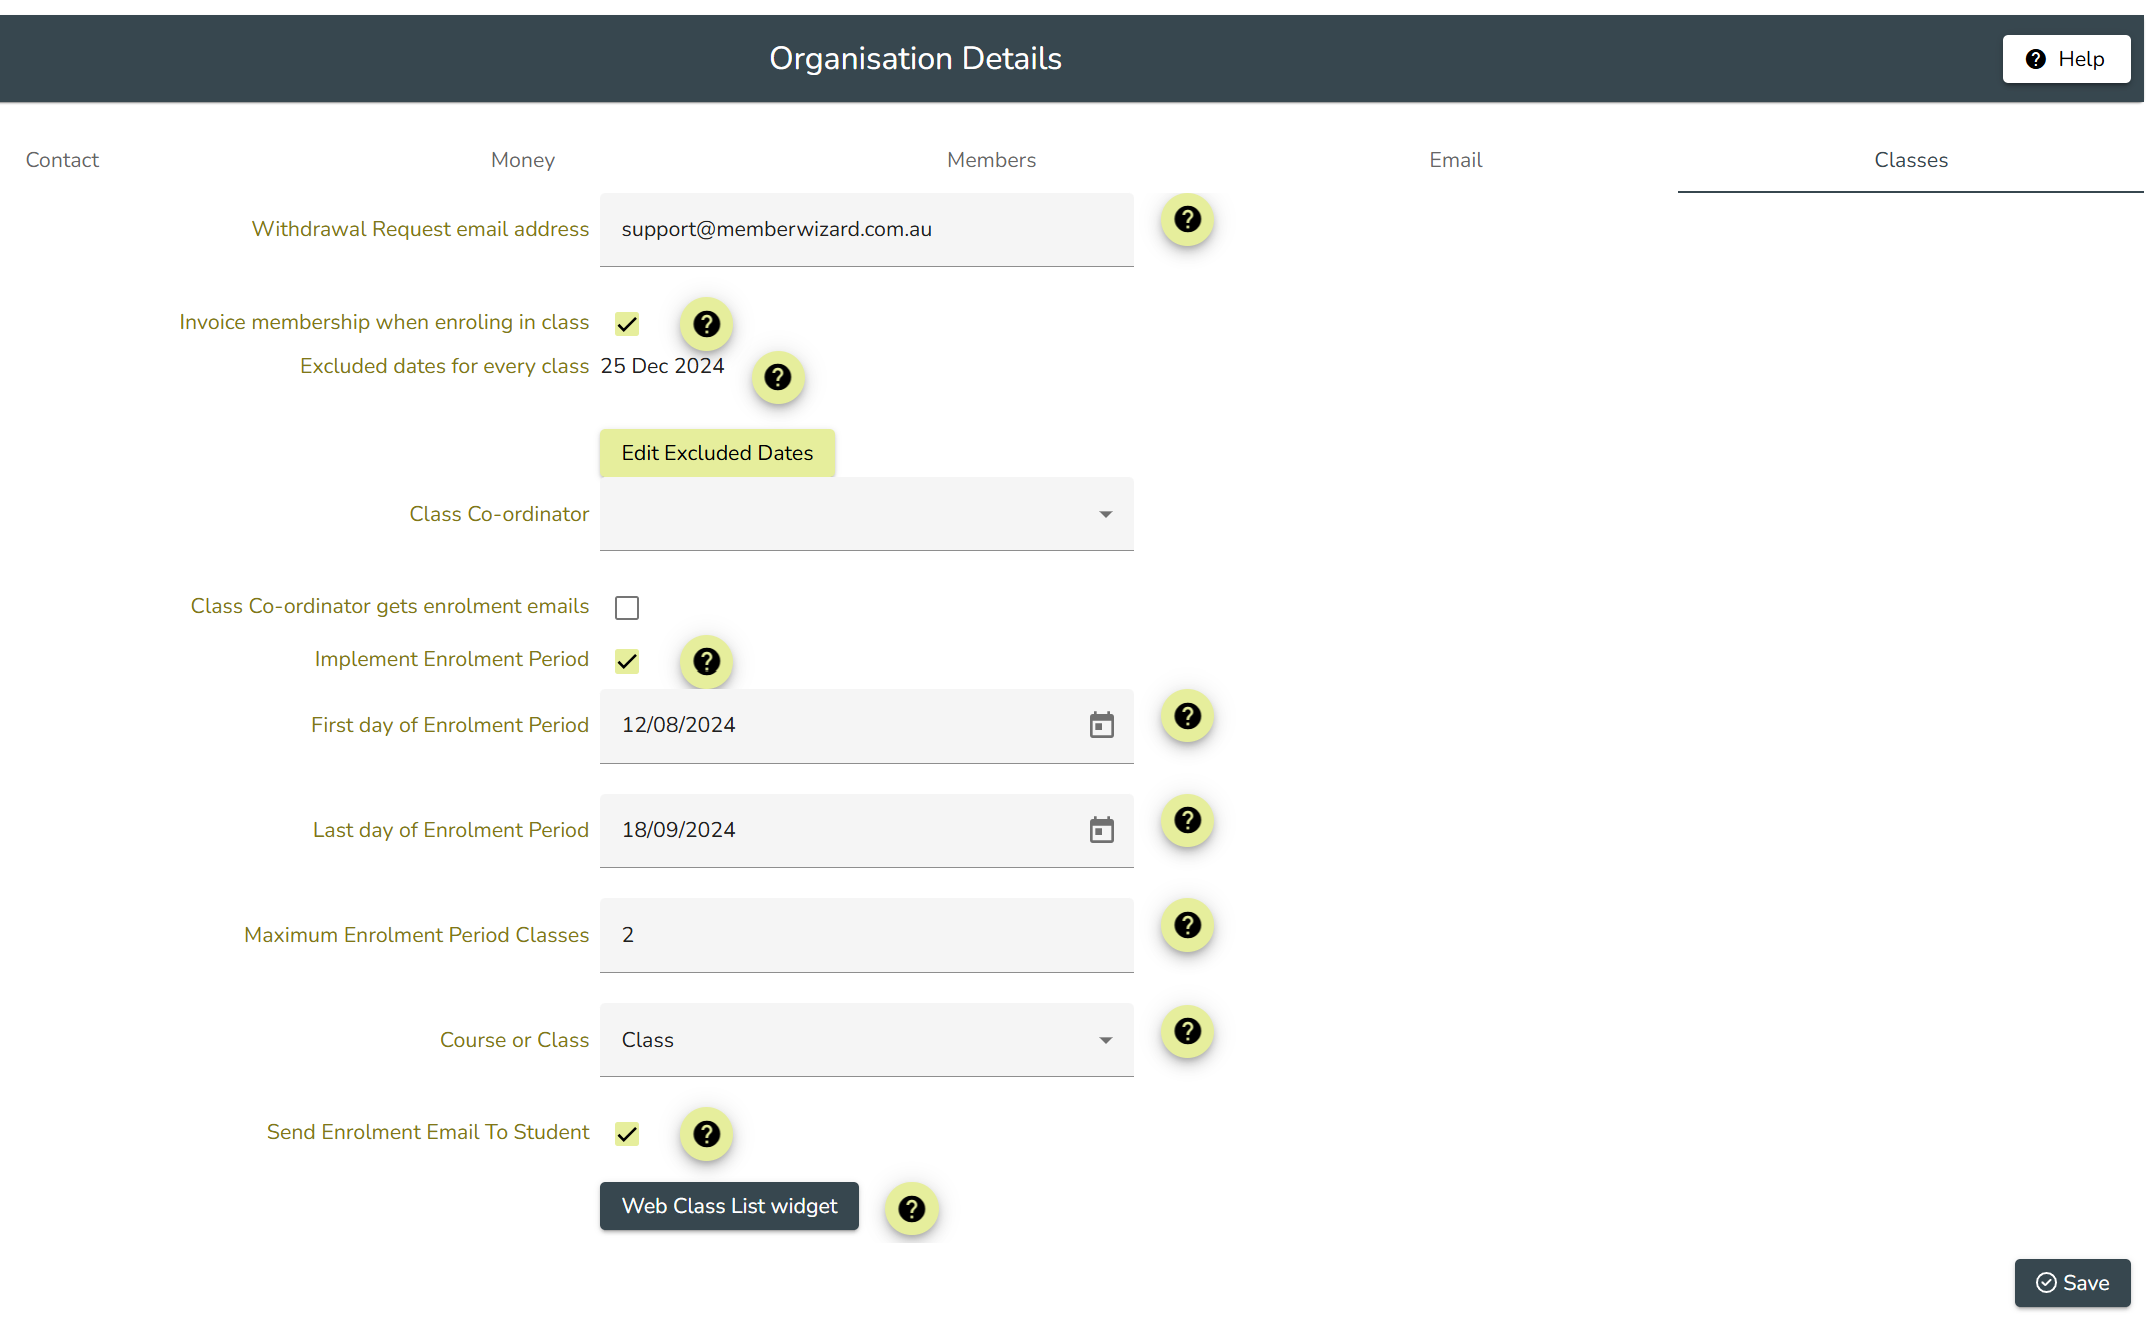
Withdrawal request email address
|
| 3/5/2025 |
1267 |
Allow spaces in custom field names
Request to database API's are repeated if the network fails
|
| 2/5/2025 |
1262 - 1266 |
Bug fixes
Qualifications report
|
| |
1254 - 1261 |
Fix bug in validating Settings / New Member Application
Mark attendance shows totals
Fix Attendance sheet
Enrolment from the web class list now involves a shopping basket
|
| 15/4/2025 |
1253 |
Single day class shows correct date on attendance sheet
Format Attendance Sheet
If Suspend enrolment emails is ticked in Edit Class, then no enrolment emails are sent to Tutors, Convenors, or the Class Coordinator.
|
| 14/4/2025 |
1252 |
Stripe card entry more visible
New field in Event: Email Registration To Organiser
Fix bug in Class Timetable
|
| 11/4/2025 |
1251 |
Print attendance sheet reformatted to prevent losing dates and page break splitting a line.
If an organisation is configured for a joining fee, then the invoice created by Add Member in the Member List adds the Joining fee
Tutors can delete absence advice
In Settings / New Member Application: Number of months before end of year must be an integer
|
| 8/4/2025 |
1250 |
Add assessor permission changed to Members
|
| 4/4/2025 |
1248 |
Organisations can now charge a joining fee for new members. The fee invoiced when a member joins using the New Member application and from the web Class List. Coming soon: when a new member is added in the Member List and is invoiced directly after save a joining fee line will be added to the invoice
|
| 2/4/2025 |
1247 |
Tutor portal reply to address visible
Back button does NOT delete the email you've just typed
Minimise duplicate member records by warning if same first name, last name and email are present
|
| 2/4/2025 |
1246 |
Fixed bug in Outstanding by Category report
Members can now delete an Absence Advice from the Member Portal
Fixed bug in Tutor Advise Absence
Fixed bug non-member event registration
Fix Date sent for enrolment email when student moved from waiting list to enrolled
|
| 31/3/2025 |
1245 |
Enable Certificate Number in Add / Edit Assessment
|
| 28/3/2025 |
1244 |
Replace the header logo enabled for website template
User sending SMS is notified if card top up fails
Retained Earnings menu button hidden. Available on request
Ensure "Class has vacancies" label in the edit member class tab is correct
When a stripe refund is saved, remind the user to check the paid to date
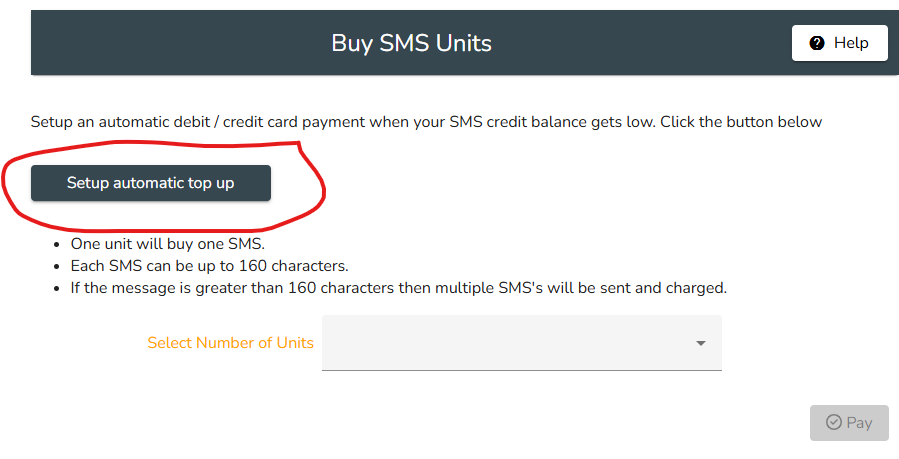
Remove minimum balance amount in SMS top up
|
| 26/3/2025 |
1243 |
When Copying class the Date Added for enrolled students is changed to the date when copy class occurred
|
| 24/3/2025 |
1242 |
Fix errors in Owing by Category
|
| 20/3/2025 |
1241 |
Fixed automatic topup
Tutors can enter Absence Advice for their students
|
| 18/3/2025 |
1240 |
Event Payment types can be ticked as Admin Only. This means that they can only be chosen in the Member Wizard app. by admin staff
Assessors can be added
Assessments now require an assessor
|
| 17/3/2025 |
1239 |
Copy class emails are saved in Communications Sent
Enrol emails include dates and times
|
| 17/3/2025 |
1238 |
Fix Stripe
|
| 17/3/2025 |
1237 |
Weekly timetable only shows weekend days if there are classes on these days
Communications Template stays open after save button clicked so that editing can continue
Extra tick box added to Print Attendance Sheet to prevent Tutors accidentally including member contact details
Admin can now mark attendance electronically using paper sheet as input data
Include Member Number in All Classes Student List
Kina Bank payment restored
|
| 14/3/2025 |
1236 |
Temporarily remove Kina Bank payment
|
| 14/3/2025 |
1235 |
Enable use of Stripe S700 Credit Card reader
|
| 13/3/2025 |
1234 |
In the Tutor Portal, tutors with only one class do not need to select it to use actions
Fix bug which may prevent member Portal login if an inactive user has the same email address
Show invalid email address warning only if control is enabled
Weekly timetable available
Stripe version upgrade
|
| 10/3/2025 |
1233 |
Display invalid email address warning in event registration
Qualifications and Assessments
|
| 8/3/2025 |
1232 |
Now possible to SMS Tutors
|
| 7/3/2025 |
1231 |
Fix Pay by Card
|
| 6/3/2025 |
1230 |
Fix bug in Class Timetables
SMS price raised to 10c
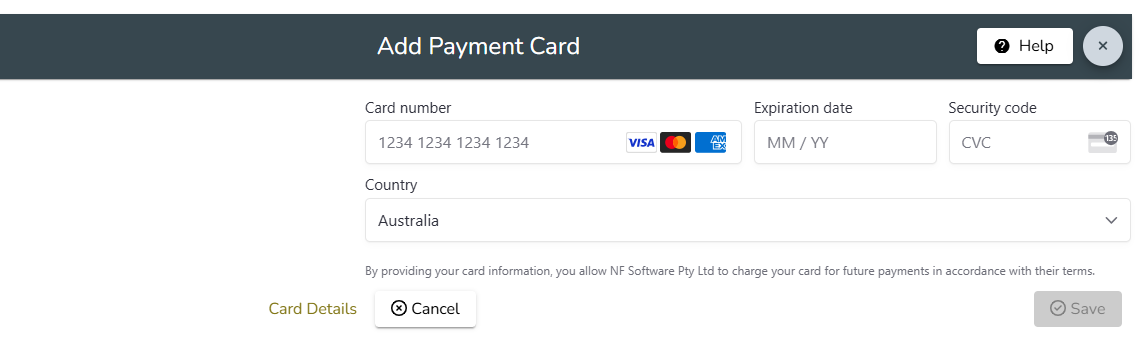
SMS units can only be bought by using a registered payment card
|
| 4/3/2025 |
1228 - 1229 |
Fixed bug where over-paid membership receipt does not update paid to date
New member sees thank you page if nothing to pay
Class timetable available
Attendance sheet fixed for single date classes
Solid border option available in Froala email / class description editor
Tick-box in Add / Edit Class form: Display in Web Class List
|
| 28/2/2025 |
1227 |
The New Member application can be configured so Pending Members are not immediately invoiced.
Fix bug in MW Website / Website page that doubled up https://
|
| 28/2/2025 |
1226 |
Students on the waiting list can be imported from spreadsheet
In Events, the label for the field: "Notes For Organiser" can be configured
|
| 27/2/2025 |
1225 |
Student members made inactive get notification email
|
| 26/2/2025 |
1224 |
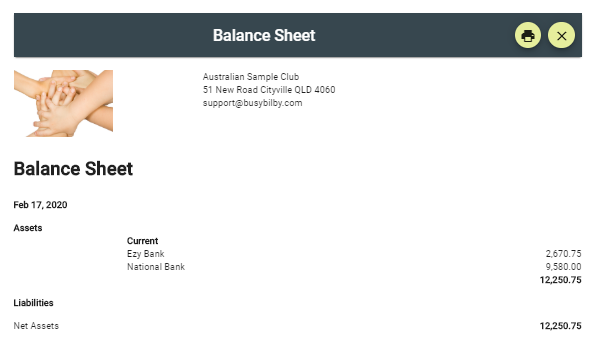
Balance sheet export now shows previous year
|
| 25/2/2025 |
1223 |
Membership certificates for POMCCI and YPMCCI
|
| 22/2/2025 |
1221 - 1222 |
Fix edit Event Registration bug
|
| 22/2/2025 |
1220 |
Enable entry and import of member Medical Conditions. These are displayed on the back of the Name Tag
|
| 22/2/2025 |
1219 |
Restore export class list to excel
|
| 21/2/2025 |
1207 - 1218 |
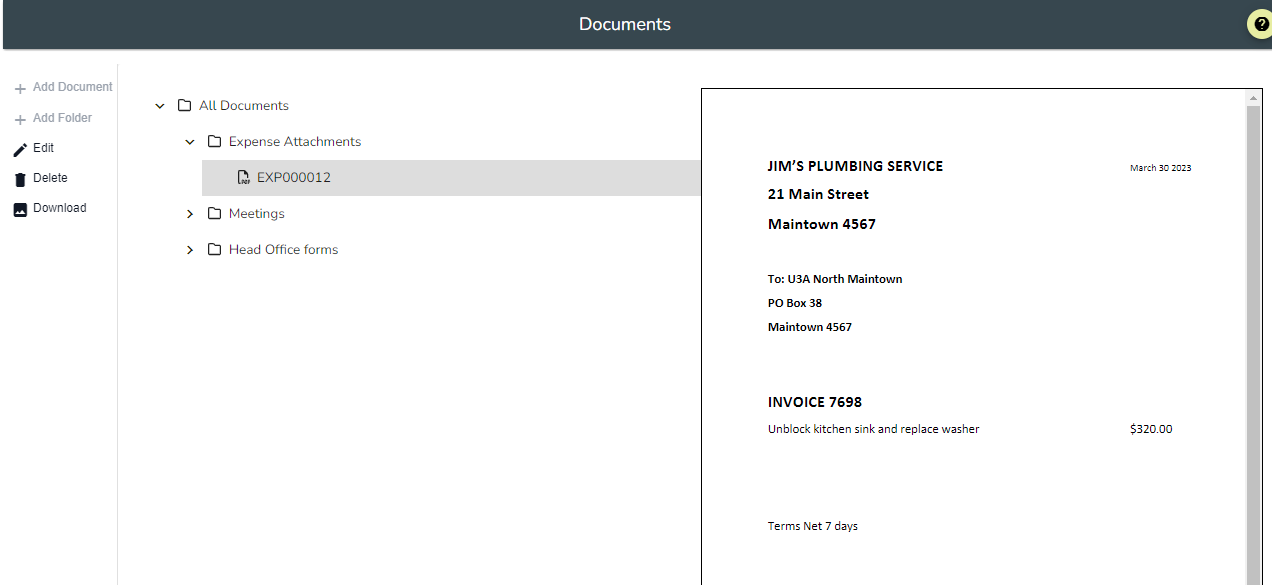
Allow download of expense attachment
Allow unlimited enrolments of online classes
Remove Close button on attachments page
Add download button to view image document page
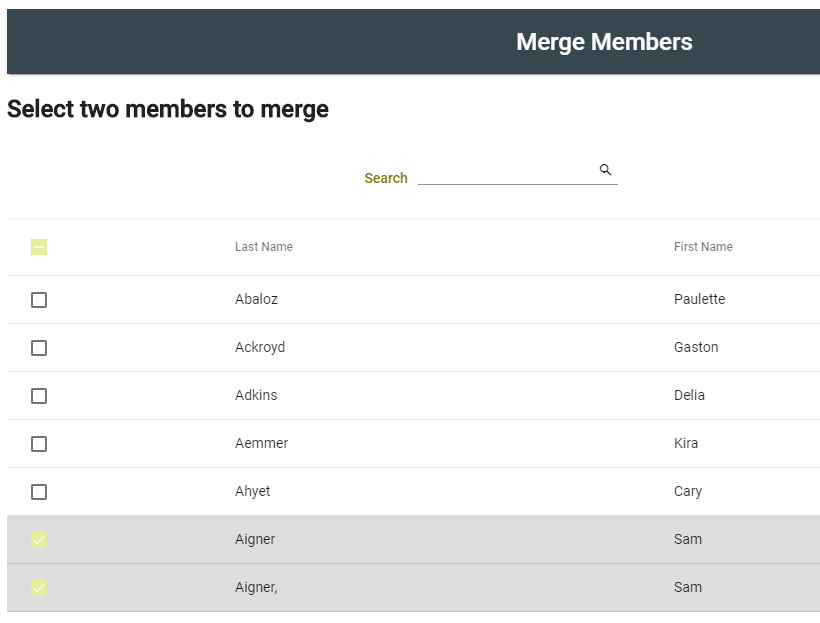
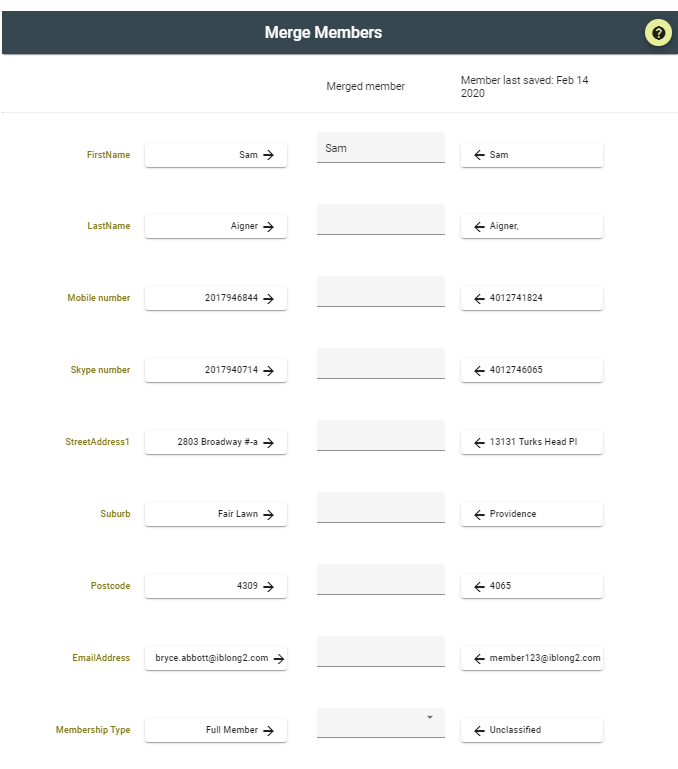
Unlock members when merge members is cancelled
Add Owing column to Active Classes enrolled list
Allow tutor to view details of a class in the portal
Display n/a in member list for paid to and invoices to cols if membership type cost is zero
Move Automatic SMS Credit Top-Up to Money permissions
Prevent zero people in event registration
Enable Event organisers to manage the vent in the portal
Allow edit Paid to date of zero cost membership type members
Add Paid to date to All Classes Student List
Default class name to subject when a student emails tutor from portal
"Organisation" added to the standard contact fields for a member and for a debtor
Students in free classes are now removed from the class when the member is made inactive
Membership refunded in Stripe now changes the Paid To date of a member correctly
Fix bug in image upload in Froala class and email editor
Undeliverable email lists now include phone number and the list can be exported to Excel
Apologies for delay in updating this list
|
| 6/2/2025 |
1206 |
No membership invoice line is created when enroling if membership cost is zero
Link to website or preview available in Website / Website
Enrollment / remove from class emails to students can be turned off
|
| 5/2/2025 |
1203 - 1205 |
Organisations can call their classes "Courses"
|
| 3/2/2025 |
1202 |
Fix Enrol / Remove email to student: actions initiated by students are now attributed to them
Print or Download buttons on class resource viewer
|
| 2/2/2025 |
1201 |
Organisation is required for contact us / feedback
Enable view web link
Allow pending member to access portal
Students now receive an email when removed or added to a class which includes the email address of the person who has carried out the action.
|
| 31/1/2025 |
1200 |
Refresh category cache when membership type is added / edited / deleted
Students receive an email if they are enrolled or removed from a class
This email is visible in Member / Communications and Communications / Communications Sent
|
| 30/1/2025 |
1199 |
All Classes Student List export to excel now uses appropriate file name
When an unfinancial member enrols in a free course a membership invoice is created
|
| 28/1/2025 |
1196 - 1198 |
Database processing power increased by 150%
Classes Brochure
All students export Date Added formatted
Print Attendance sheet more compact
Member Portal Class Resource viewer re-formatted
|
| 25/1/2025 |
1193 - 1195 |
Enable delete Membership Type
Print names tags can be sorted by name or Member Number
Display Attendance shows Advise Absence
All classes Student List now includes Date Added
|
| 20/1/2025 |
1191, 1192 |
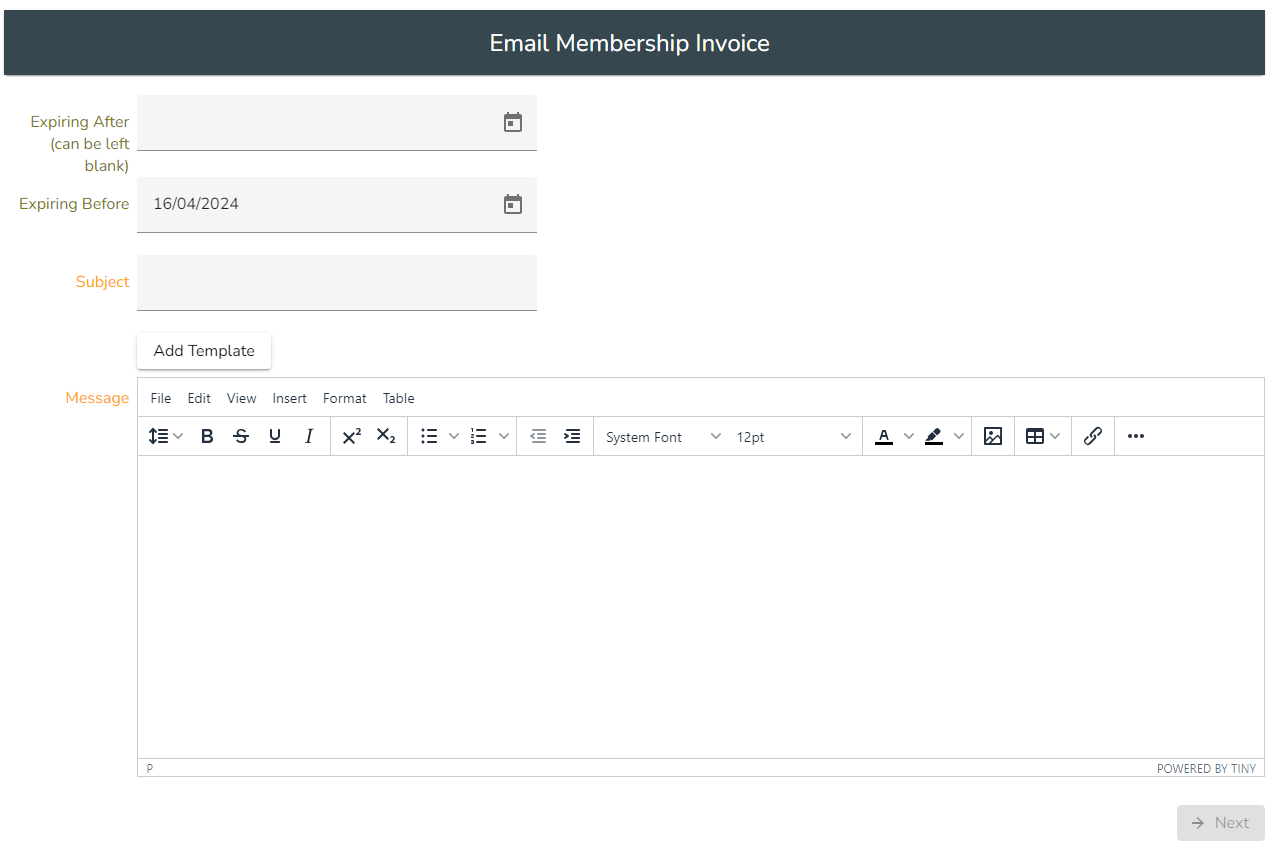
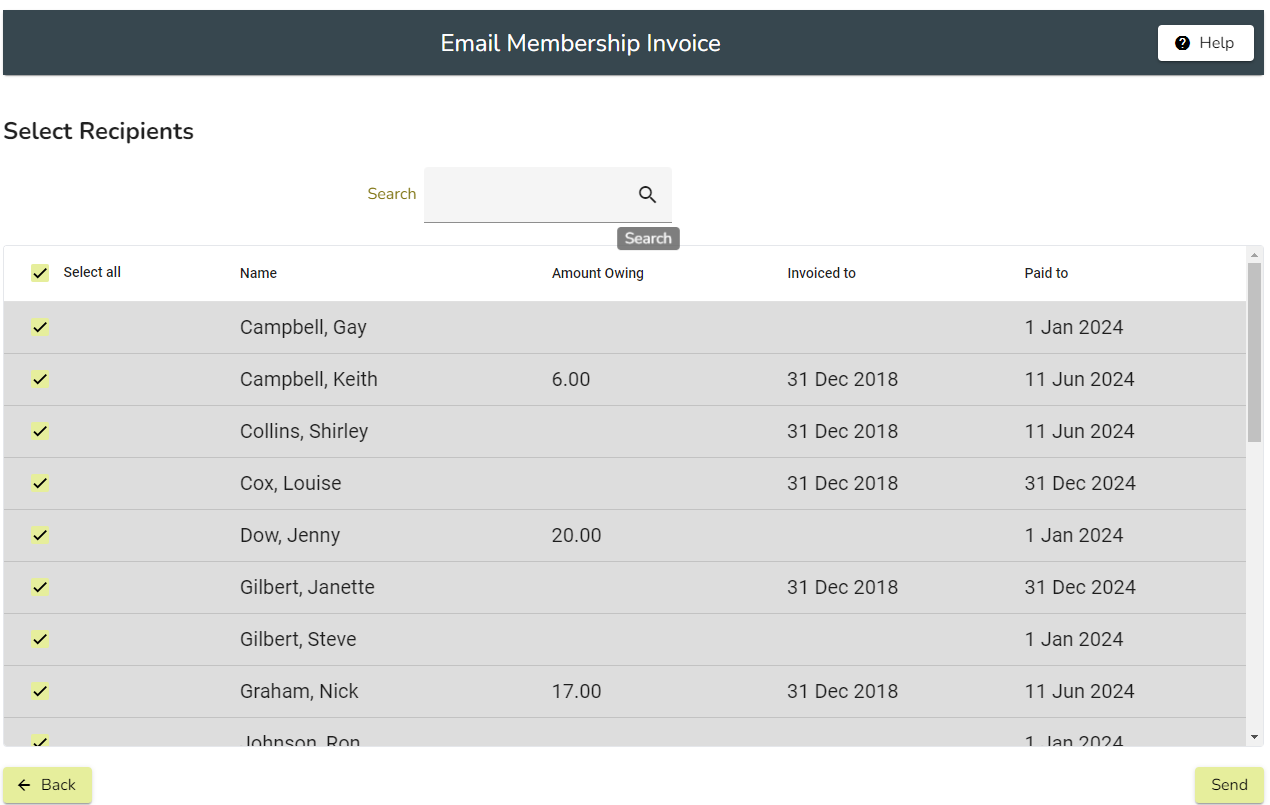
Email Pay Owing now includes Pending Members
Add orange-red colour to timepicker warning message
Add font size 16 to froala
Width/Height Properties for Buttons
Add line height 1.3 to froala
Make course fee visible for online courses
Html resources for Online Courses
Added Class Admin to Convenor labels
|
| 12/1/2025 |
1191 |
Online classes
|
| 8/1/2025 |
1190 |
Remove circular dependencies.
Improved colour choice in html editor
Validate email address and year of birth in new member form
|
| 4/1/2025 |
1189 |
Improve Balance Sheet labels. Add warning to Retained Earnings page
|
| 4/1/2025 |
1188 |
Fix date picker
|
| 3/1/2025 |
1184 - 1187 |
Improve support for old IOS devices
Fix Tutor Portal email attachment issue
Fix various small bugs
|
| 27/12/2024 |
1183 |
Upgrade to Angular 19
|
| 23/12/2024 |
1182 |
Locked member list filtered to show those locked in the last 60 minutes
|
| 18/12/2024 |
1181 |
Class resources
|
| 17/12/2024 |
1180 |
Fixed bug in import classes
|
| 14/12/2024 |
1179 |
Fixed end date bug in creating membership invoice line when a member enrols in a class
|
| 13/12/2024 |
1178 |
Enable users with classes permission to email students and tutors
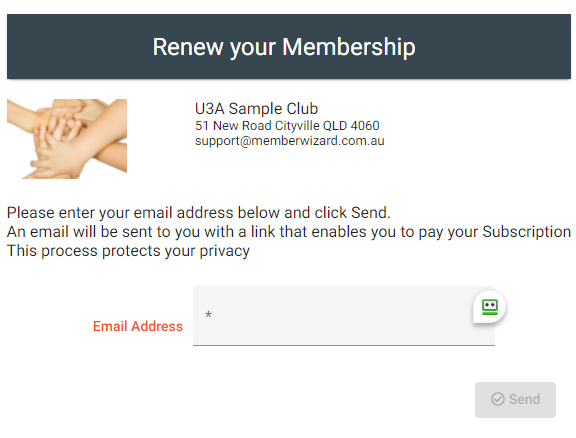
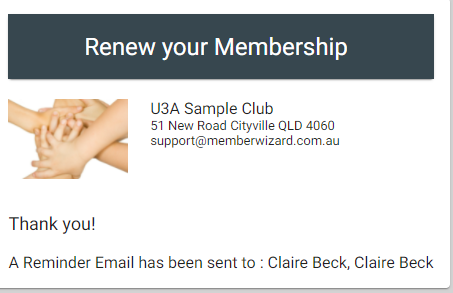
When a member clicks Renew Membership link on a website:
if their email address is not found they are informed
If their email address is shared with another member they are asked to renew using the portal or contact their organisation
If they have already paid recently they are informed
If they have created a recent unpaid invoice it is emailed to them
Otherwise, a new invoice is created and emailed to them
|
| 11/12/2024 |
1177 |
Correct pricing on home page
Fix bug in Balance Sheet
Manage attachments help
|
| 9/12/2024 |
1176 |
Retained Earnings included in Balance Sheet equity
Attachments can be made inactive so that they do not show in the list when emailing
|
| 7/12/2024 |
1175 |
Prevent uploading .url files as attachments
|
| 5/12/2024 |
1174 |
New flag in Edit Tutor: Allow add or remove Students
When reloading the Member Portal when a new version is updated, the member stays logged in
|
| 5/12/2024 |
1173 |
Pay now button in portal hidden if member is in credit
When Copying a class the Wait list added dates are retained
Email student list to tutors now enables editable subject and message
|
| 4/12/2024 |
1171, 1172 |
Fix bugs in Froala implementation
|
| 3/12/2024 |
1170 |
Invoice extra year for members with last years paid to dates
|
| 3/12/2024 |
1169 |
Prevent email message greater than 5 MB
|
| 2/12/2024 |
1168 |
Extra save button in Edit Class
Hide Home button in portal if not logged in
Emailed class invoice subject includes "Payment Due for ..."
Emailed invoice shows org. website
|
| 2/12/2024 |
1167 |
Create link in Froala email editor
|
| 2/12/2024 |
1166 |
Change html editor from TinyMce to Froala
|
| 1/12/2024 |
1165 |
Fix Stripe calculations where organisation pays fees
|
| 30/11/2024 |
1164 |
Improve Stripe and Kina Bank display
|
| 29/11/2024 |
1163 |
Invoice membership if needed when member enrols in a free class
|
| 27/11/2024 |
1162 |
Users with Members permission and no Money permission can now enter and save Receipts
In Email Members, the Reply To address can be changed to the email address of a User
|
| 26/11/2024 |
1161 |
Fix algorithm calculating expected Stripe fee
|
| 25/11/2024 |
1160 |
Kina Bank fixes
|
| 24/11/2024 |
1159 |
Enable Kina Bank payment gateway for organisations in Papua New Guinea
|
| 23/11/2024 |
1158 |
Fix homepage on recent iphone
Fix help and home buttons in member portal
|
| 23/11/2024 |
1157 |
Fix select all in filtered list
|
| 20/11/2024 |
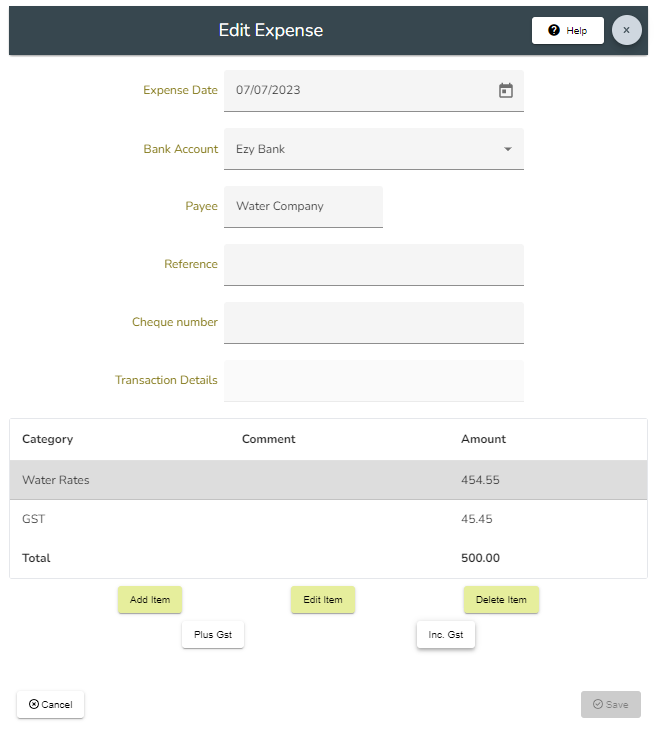
1156 |
Hide Receipt. Invoice and Expense GST buttons unless organisation is registered for GST
Add Membership type to Event Registration List
Unlock member record after 60 minutes
|
| 19/11/2024 |
1155 |
Prevent edit or delete of system categories
|
| 19/2024 |
1154 |
Enable change of reply to address when using Email Members
Colour of text and background of buttons in web template editable
|
| 17/11/2024 |
1153 |
When a student is moved from one class to another emails are sent to the class tutors
|
| 16/11/2024 |
1152 |
When a student is moved to the waiting list, unpaid invoices for the class are deleted
When Enrolled or waiting list student list is emailed to the tutor, the email subject indicates enrolled or waiting list
|
| 15/11/2024 |
1151 |
Move student from one class to another. The student is enrolled in the new class with the same Prepaid dates and Invoice number.
Invoice and receipt lines and the Member's comments in their member record for the class should be appended with a description of the move and their Account Category should be updated
There is no provision for credit notes or invoices if an adjustment needs to be made, this will need to happen manually after the move
|
| 13/11/2024 |
1150 |
Fix errors in Move student to another class
|
| 12/11/2024 |
1149 |
Name tags: whether to print organisation name is now in Settings / Members
Search for dates in lists is improved
|
| 11/11/2024 |
1148 |
Print Attendance sheet now shows Attendances marked in the Tutor Portal
|
| 11/11/2024 |
1147 |
Enable Update Contact Details in Pay Owing
|
| 11/11/2024 |
1146 |
Enable classes to use Every 4 Weeks scheduling
|
| 10/11/2024 |
1145 |
Migration to Control Flow Syntax (preparation for angular 19)
|
| 9/11/2024 |
1143 - 1144 |
Fix event Registration problems
|
| 8/11/2024 |
1142 |
Enable edit of membership paid to date if the member is in credit
|
| 7/11/2024 |
1141 |
Member number displayed in emailed invoice.
Member number shown in popup when online new member form saved
|
| 6/11/2024 |
1140 |
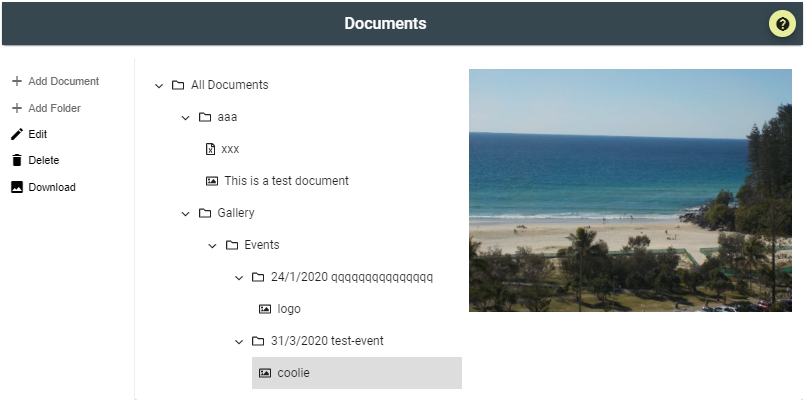
Nodes in Document tree can be right clicked for a context menu
|
| 4/11/2024 |
1139 |
All Classes Student list now defaults to Active classes
Membership types months available: 1, 2, 3, 4, 6, 12
Display message in Member Portal if local storage is not available
|
| 4/11/2024 |
1138 |
Fix Receipt Paid to Date bug
|
| 4/11/2024 |
1137 |
Bug fixes
|
| 3/11/2024 |
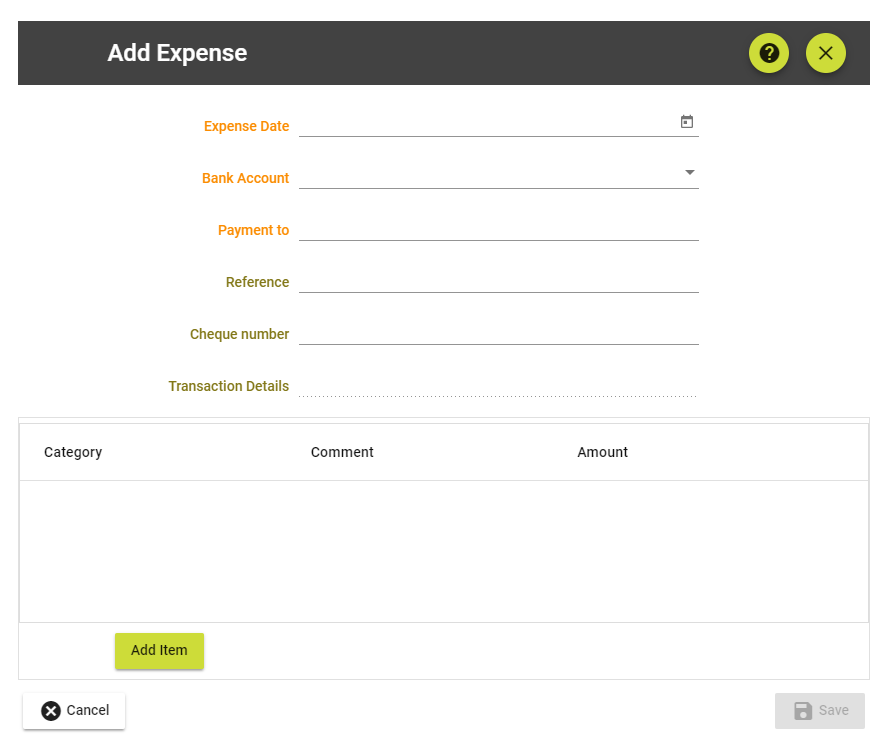
1136 |
Typing in payee field of Expense form now filters its dropdown list
|
| 2/11/2024 |
1135 |
Email Students and Tutors: now possible to filter the students by enrolled / wait list status
|
| 1/11/2024 |
1134 |
Move student from class: If the cost of the new class is the same as the old class, and the student is given full credit for the old class, a zero total invoice detailing the move, and a general journal moving the income from the old class to the new class, are created
|
| 31/10/2024 |
1133 |
Search of lists only searches displayed columns
|
| 30/10/2024 |
1132 |
Blank lines restored to Print Attendance sheet
More than 3 incorrect password attempts results in a lockout for half an hour
|
| 28/10/2024 |
1131 |
Administrators need 100% strength password to save when changing
Name tag height and width can be set in Organisation Details / Members
|
| 28/10/2024 |
1130 |
Login and change password forms have a password strength meter
|
| 24/10/2024 |
1128 |
Emails with a reply to address of noreply@memberwizard.com.au are minimised
My Classes in the portal displays well on a phone
|
| 23/10/2024 |
1127 |
Member Portal can be installed on phones if privacy settings allow saving to local storage
|
| 23/10/2024 |
1126 |
Calculate correct end date when adding a membership invoice line to a class invoice
|
| 22/10/2024 |
1125 |
Now possible to print or email multiple attendance sheets
|
| 19/10/2024 |
1124 |
A group can be configured as an early enrolment group. This allows members of this group to enrol in classes before an enrolment period begins
Event contacts must be a member
Border colours when editing the website portal distinguish panels, sections and pages
Unpaid class invoices are deleted when a member is removed from a class
|
| 15/10/2024 |
1123 |
All classes student list can now show inactive and archived classes
Files and documents can now be dragged and dropped in the document list
Member Portal now asks member to confirm that they want to pay subscription if they are already invoiced to more than 2 months ahead
|
| 14/10/2024 |
1122 |
New checkbox in Organisation Settings / Member: Allow Portal Membership Renewal
|
| 10/10/2024 |
1121 |
Name tags: make organisation name optional
|
| 9/10/2024 |
1120 |
Tutor portal class list has an option to show inactive classes
|
| 6/10/2024 |
1119 |
Allow Cost Per Lesson for single day course
|
| 4/10/2024 |
1117,1118 |
Bug fixes
|
| 29/9/2024 |
1116 |
Email Pay Owing: display email address and filter to display Bigpond members
|
| 28/9/2024 |
1115 |
Bug fixes
|
| 25/9/2024 |
1114 |
Add Gender and Country to fields that can be imported from a spreadsheet of members
Enable importing a spreadsheet of Account Categories
|
| 19/9/2024 |
1113 |
The following Website Template panels can now will now adjust for height depending on the text in them, and can justified left, centre and right on the page: Download, Link, Member Portal, New Member and Renewing Member
Events are now displayed showing text style eg colour, font-weight
Web Class List can be filtered by venue
|
| 17/9/2024 |
1112 |
Most Recent Portal Action is now available as a field in Member Form Layout and inPrint Member List. Actions displayed are: Saved password, Successful login and Failed login
|
| 16/9/2024 |
1109 - 1111 |
Bug fixes
|
| 15/9/2024 |
1108 |
Event registration list and waiting list is now in date order
|
| 13/9/2024 |
1108 |
Print multiple name tags available in Print Member List and Tutor Portal
Upload logo: show error message if file chosen is not an image
|
| 11/9/2024 |
1107 |
Fix invoicing membership when a member has a paid to date and no Invoiced to date
|
| 11/9/2024 |
1106 |
Enable defining an Enrolment Period during which numbers of enrolments per person is limited
|
| 5/9/2024 |
1104 |
Fixed bug in Documents module
|
| 4/9/2024 |
1103 |
New checkbox for tutors: Allow Student Portal Contact. If checked, students are allowed to contact their tutor using Member Portal My Casses page
|
| 3/9/2024 |
1102 |
Enable email to tutor, convenor and class coordinator from My Classes in Member Portal
|
| 2/9/2024 |
1101 |
Enable select a Subject Category when adding / editing a Class Subject
|
| 2/9/2024 |
1100 |
Fix bug in add / edit category
|
| 2/9/2024 |
1098 |
Enable find Invoices using a Category
|
| 30/8/2024 |
1097 |
Owing by Category report
|
| 30/8/2024 |
1095,1096 |
Bug fixes
|
| 30/8/2024 |
1094 |
Enable Register for GST in settings. If registered, all automatic invoices have a GST line applied
|
| 29/8/2024 |
1093 |
Print Newsletter from Newsletter List
|
| 29/8/2024 |
1092 |
Class status change page: fix button caption
"Select all" on filtered list only selects visible rows
New checkbox on Email Members: Exclude Event Attendees
|
| 29/8/2024 |
1091 |
Fix Invoiced period display for single day class
|
| 20/8/2024 |
1090 |
Display Attendance enhancements and bug fix. Now displays members who are removed from the class if they have attended or advised absence
|
| 16/08/2024 |
1089 |
Enable invoice single day class
Website template now allows for adjustment of margins outside panels by adjusting the distance down to 0 in the Section edit form. Fixed menu link colour not showing correctly.
|
| 15/8/2024 |
1088 |
Create a Retained Earnings journal entry based on profit and Loss
Fix error in Trial Balance report
|
| 13/8/2024 |
1087 |
Allow right click Add Category in Category List
Allow drag dialogs for non-touchscreen devices
|
| 13/8/2024 |
1086 |
Display Attendance page added to class menu.
Edit Receipt form now displays the Deposit Number
|
| 9/8/2024 |
1085 |
Member record is locked while the member data is being edited
|
| 7/8/2024 |
1083 |
Website images are compressed to a max size 200KB
PNGID certificate signature for facilitator
Email is sent to event participant confirming their registration
Payment Income Category in Add Event now only shows Income categories
|
| 6/8/2024 |
1082 |
Enable register for event from class list
|
| 2/8/2024 |
1081 |
Re-arrange file structure to prevent Member Portal NG0203 errors
|
| 31/7/2024 |
1080 |
New checkbox in Edit Class: Suspend enrolment emails. It prevents all enrolment emails to tutor, vonvenor, and coordinator
This can be changed on multiple classes in Classes Status Change
|
| 29/7/2024 |
1079 |
Make it possible to disable Name Tag printing in the Member Portal
|
| 27/7/2024 |
1078 |
Enable zoom presentaion booking
Change build configuration to facilitate access to the portal using older iphones
Fix bug in email members that caused an error when adding an extra member to the send list
|
| 25/7/2024 |
1076 |
Merge member: classes and groups are easier to read
Member dropdown in Receipt, Add student to class now displays member number
Able to configured unpaid invoices as Proforma, and add terms and conditions
|
| 24/7/2024 |
1074 |
Add Attendance Certificate for client
Email to tutor when student is added makes clear if the student is enrolled or has joined the waiting list
Reset Pin / Password added to Member Portal
|
| 21/7/2024 |
1073 |
New member Portal converted to PWA to minimise missing chunk errors
|
| 21/7/2024 |
1072 |
Use configured First Name and Last Name labels in Event Registration
|
| 19/7/2024 |
1070 |
Enable name tag printing in the Member List and the Member Portal
|
| 18/7/2024 |
1068 |
Non-member attendees to be added to an event in Member Wizard.
Minimise duplicate member creation in register for event from website link
|
| 17/7/2024 |
1067 |
Update API application dependencies
|
| 14/7/2024 |
1066 |
Allow change non-membership to membership line on a receipt
|
| 14/7/2024 |
1065 |
Websites can add background and text colour
|
| 13/7/2024 |
1064 |
Add times and venue to class list calendar
|
| 12/7/2024 |
1063 |
Enable Roll Marking in never-ending classes
|
| 12/7/2024 |
1062 |
Enable Roll Marking in tutor portal.
Increase width of new member portal
|
| 11/7/2024 |
1061 |
Fix minor bugs in portal
|
| 10/7/2024 |
1060 |
New member portal. Allows member number for registration.
|
| 8/7/2024 |
1059 |
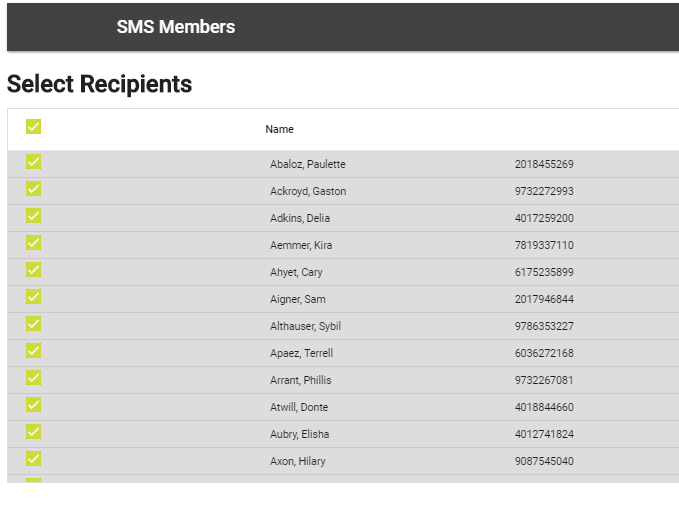
Remove selectAll in SMS members
Correct reply to number in SMS members
|
| 7/7/2024 |
1057 |
Purchase SMS units emails invoice
|
| 2/7/2024 |
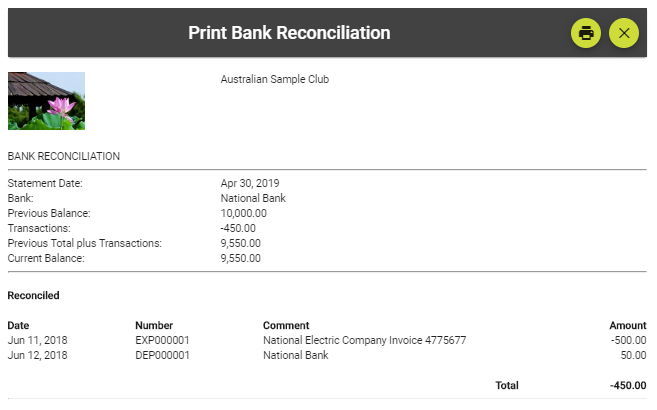
1057 |
Fix Print Bank Reconciliation bug: transactions not showing if their total is zero
|
| 1/7/2024 |
1056 |
Tutors given option to not display email address.
Trial balance start date removed
Fixed bug in New Member invoice for 6 month membership types
|
| 29/6/2024 |
1055 |
Fix bug in Email Class Payment Request
|
| 29/6/2024 |
1054 |
Angular version 18
|
| 28/6/2024 |
1053 |
Fixed bug preventing class enrol in website
|
| 27/6/2024 |
1052 |
Individual client requirements
Class description in Web Class Lists displays styles
Client membership certificate background
|
| 27/6/2024 |
1051 |
Fix bug in Advise Absences from Member List.
Change labels 'Emergency Contact' to 'Emergency Contact / Relationship'
|
| 26/6/2024 |
1050 |
Enable Advise Absence in Member List. Fix bug in Pay Owing where admin fee was incorrectly added to the Direct Deposit total |
| 20/6/2024 |
1048 |
Fix bug in class import. Owing for Class added to All Classes Student List |
| 19/6/2024 |
1047 |
Fix import of class fields. |
| 19/6/2024 |
1046 |
Member Portal: On narrow devices My Classes now has a hamburger button to open an action menu |
| 18/6/2024 |
1045 |
Enable import of Class fields: Day of Week, Week of Month and Frequency |
| 17/6/2024 |
1044 |
Fix bug preventing save term costs to Classes |
| 17/6/2024 |
1043 |
Link to Change Log is available in Help Resources. Year of Birth can be included when importing members from a spreadsheet |
| 16/6/2024 |
1042 |
Website Template. Fix bug in Google maps publish |
| 15/6/2024 |
1041 |
Year of Birth added as a standard member field |
| 14/6/2024 |
1040 |
Members can advise intended absence from class from My Classes list in the Member Portal. Emails are sent to Tutor, Class convenor, and Classes Coordinator. Printed and emailed attendance sheets are marked with an "A" |
| 13/6/2024 |
1039 |
Start Date, Finish Date, Start Time, Finish Time added to Class Import |
| 13/6/2024 |
1038 |
Message is now visible in Communications Sent |
| 12/6/2024 |
1037 |
Changed Help files to link to Hesk |


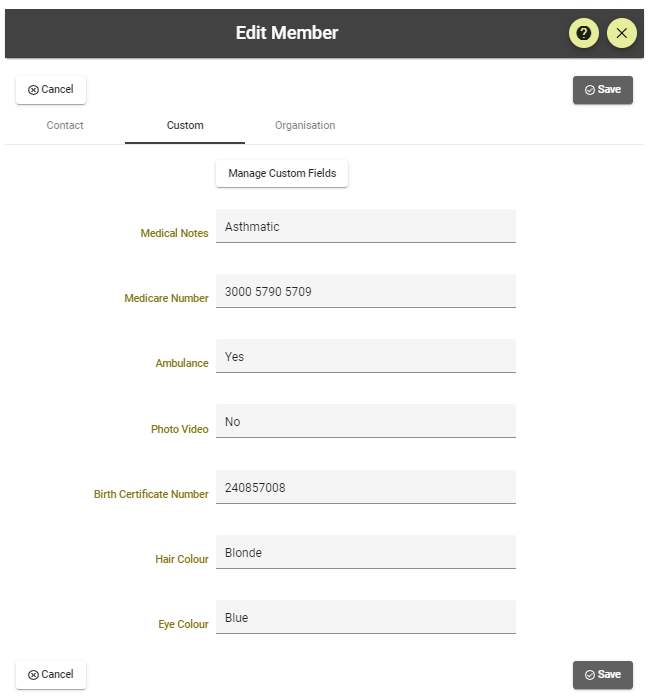
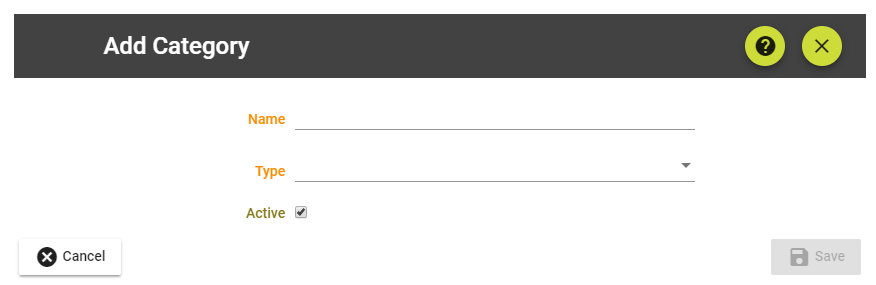
 Select the appropriate type then ensure the Active box is checked. If you no longer wish to display a custom field you can uncheck this box and it will no longer appear.


 .
.

 .
.


 symbol in the Text box menu.


